Discover a transformative 10-day detox program featuring nutrient-rich green smoothies. Designed to promote weight loss, boost energy, and enhance overall health, this cleanse offers a simple yet effective way to reset your eating habits and improve well-being. Based on JJ Smith’s popular guide, it’s perfect for those seeking a natural path to a healthier lifestyle. The program emphasizes whole foods, hydration, and nourishment, making it an ideal choice for beginners and experienced cleansers alike. With delicious recipes and clear guidelines, you’ll be equipped to embark on a journey toward improved vitality and long-term wellness. The 10-Day Green Smoothie Cleanse is a proven method to kickstart your health journey, helping you shed unwanted pounds and feel more energized. By focusing on green leafy vegetables, fruits, and healthy fats, this program supports detoxification and digestion, making it easier to adopt sustainable healthy habits. Whether you’re looking to jumpstart weight loss or simply rejuvenate your body, this cleanse offers a balanced approach to achieving your goals.
Overview of the Program
The 10-Day Green Smoothie Cleanse is a structured detox program designed to help individuals reset their eating habits, improve health, and achieve weight loss. Created by JJ Smith, this program focuses on consuming nutrient-dense green smoothies made from leafy greens, fruits, and water. The cleanse lasts for 10 days, during which participants drink up to 60 ounces of smoothies daily, along with optional healthy snacks and plenty of water. The program emphasizes the importance of hydration, detoxification, and nourishment to support overall well-being. It also provides a shopping list, recipes, and daily guidelines to make the process easy and sustainable. By focusing on whole foods and eliminating processed items, the cleanse aims to promote a healthier lifestyle and long-term wellness.
Understanding the Benefits of a Smoothie Cleanse
A smoothie cleanse offers numerous health benefits, making it a popular choice for those seeking to improve their well-being. One of the primary advantages is rapid weight loss, as the program reduces calorie intake while maintaining nutrient density. Participants often experience increased energy levels and mental clarity due to the high concentration of vitamins and minerals in green smoothies. Additionally, the cleanse supports detoxification by flushing out toxins and promoting healthy digestion. The program also helps reduce cravings for unhealthy foods, encouraging healthier eating habits. By focusing on whole, nutrient-rich ingredients, the smoothie cleanse provides a sustainable way to reboot metabolism and enhance overall health. Many users report feeling more vibrant and motivated after completing the cleanse, making it an effective kickstart to a healthier lifestyle.

Key Benefits of the 10-Day Smoothie Cleanse
The 10-Day Smoothie Cleanse promotes significant weight loss, boosts energy levels, and aids in detoxification. It enhances digestion, improves mental clarity, and supports overall health effectively.
Weight Loss and Improved Metabolism
The 10-Day Smoothie Cleanse is renowned for its ability to accelerate weight loss and enhance metabolic function. By incorporating nutrient-dense green smoothies, participants often experience a significant reduction in body weight, with some losing up to 15 pounds within the program’s duration. The cleanse focuses on eliminating toxins and excess sugars, which are major contributors to weight gain. Additionally, the high fiber and water content in the smoothies help suppress appetite and boost metabolism, making it easier to burn calories. Many users report improved digestion and increased energy levels, which further support their weight loss journey. This program not only helps shed pounds but also lays the foundation for a healthier, more balanced lifestyle.

Enhanced Energy Levels and Mental Clarity
The 10-Day Smoothie Cleanse is designed to rejuvenate your body and mind, leading to enhanced energy levels and mental clarity. By flooding your system with nutrient-rich green smoothies, you’ll experience a natural energy boost due to the high concentration of vitamins, minerals, and antioxidants. The detoxification process helps eliminate toxins that drain energy, while the hydrating effects of the smoothies keep your body functioning optimally. Many participants report improved focus and mental sharpness, as the cleanse removes sugary and processed foods that often cause energy crashes and brain fog. This program not only revitalizes your physical health but also sharpens your mind, helping you feel more alert and motivated throughout your day.
Detoxification and Improved Digestion
The 10-Day Smoothie Cleanse focuses on detoxifying your body and enhancing digestion, making it easier for your system to absorb essential nutrients. By incorporating green leafy vegetables, fruits, and healthy fats, the smoothies promote the elimination of toxins that can slow down digestion and overall health. The high fiber content aids in cleansing the digestive tract, reducing bloating and improving regularity. Many participants report fewer digestive issues and a reduction in inflammation, which can contribute to chronic health problems. This cleanse helps reset your digestive system, allowing it to function more efficiently and supporting long-term gut health. The combination of nutrient-dense ingredients and hydration ensures a thorough detox, leaving you feeling lighter and more energized. By the end of the program, your body will be better equipped to process foods and maintain optimal digestive health. The cleanse also introduces healthy habits that can continue to benefit your digestive system beyond the initial 10 days, making it a sustainable approach to improving overall well-being.

How to Prepare for the Cleanse
Preparing for the 10-Day Smoothie Cleanse involves gathering essential ingredients and equipment to ensure a smooth experience. Stock up on leafy greens, fruits, and healthy fats like avocado and nuts. Invest in a high-quality blender to handle tough ingredients and consider storage containers for prepping. Plan your schedule to accommodate daily smoothie preparation, perhaps prepping ingredients in advance to save time. Stay hydrated with water and consider potential detox symptoms, adjusting your routine accordingly. Familiarize yourself with smoothie recipes, either from a PDF guide or JJ Smith’s book, to maintain variety and interest. Mentally prepare for the commitment by staying motivated and possibly joining a support group. Also, check for any allergies to ingredients like protein powder or almond butter. Organize your mindset to stay committed, focusing on the benefits like improved energy and digestion. By organizing ingredients, equipment, and your schedule, you’ll be well-prepared to succeed in this detox program.
Shopping List and Essential Ingredients
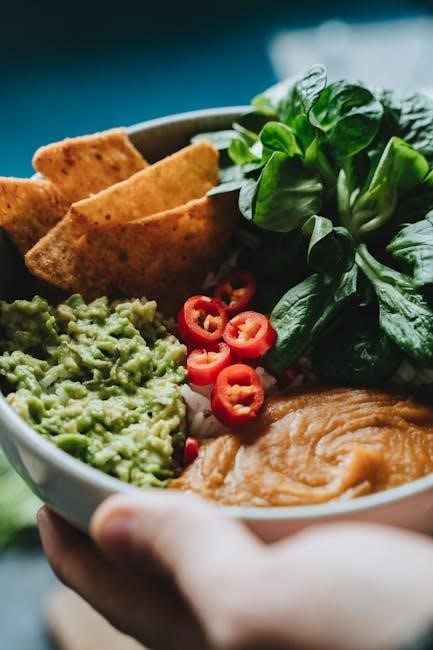
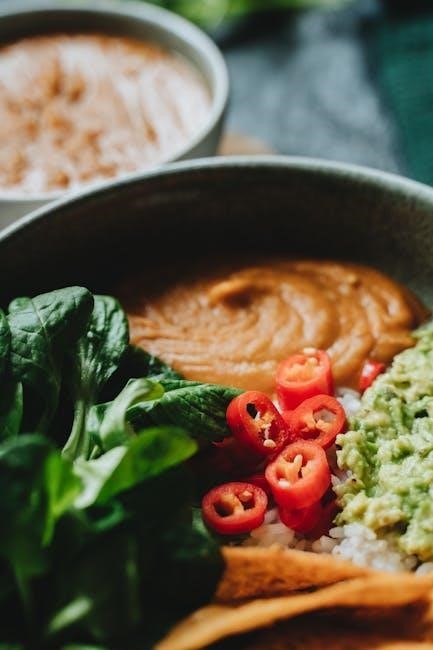
A well-organized shopping list is crucial for the 10-Day Smoothie Cleanse. Start by stocking up on fresh leafy greens like spinach, kale, and collard greens, which form the base of most smoothies. Include a variety of fruits such as apples, bananas, berries, and citrus for natural sweetness and flavor. Healthy fats like avocados, nuts, and seeds are essential for creamy textures and satiety. Almond milk or other plant-based milks can substitute water for added creaminess. Protein powder is optional but recommended for muscle support. Herbs and spices like ginger, cinnamon, and turmeric can enhance flavor and offer additional health benefits. Don’t forget to include water and herbal teas for hydration. Organize your ingredients by category to ensure smooth preparation throughout the cleanse. Having all essentials prepped and ready will make the process enjoyable and stress-free.
Equipment and Supplies Needed
To successfully complete the 10-Day Smoothie Cleanse, having the right equipment and supplies is essential. A high-quality blender, such as a Vitamix or Blendtec, is a must for creating smooth, creamy textures. Mason jars or reusable containers are perfect for storing and transporting your smoothies. A cutting board and knife will help you prepare fruits and vegetables. A set of measuring cups and spoons ensures accurate portion control. Reusable straws and ice trays can enhance your smoothie experience. For meal prep, glass containers or ziplock bags are ideal for storing pre-washed greens and other ingredients. A refrigerator with ample space is necessary for keeping everything fresh. Optional items like a juicer or protein powder can also be included based on your preferences. Having these tools ready will make your cleanse journey seamless and enjoyable.

Daily Routine and Structure
A daily routine involves consuming 60 ounces of smoothies, typically split into two servings. Start with a morning smoothie, followed by another midday. Optional snacks like fruits or nuts and plenty of water are encouraged. This structure supports detoxification and energy balance throughout the day.
Smoothie Recipes for Each Day
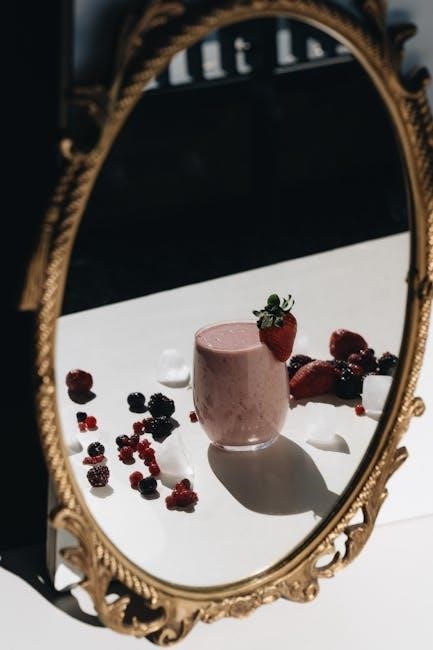
The 10-Day Green Smoothie Cleanse provides a variety of delicious and nutrient-rich recipes. Each day features a unique blend, ensuring diversity and nutritional balance. Day 1 starts with a Berry Green smoothie, combining spinach, apples, and berries for a refreshing taste. Subsequent days introduce ingredients like kale, bananas, and mango, offering a mix of flavors. Recipes are designed to detoxify and nourish, incorporating leafy greens, fruits, and optional boosters like protein powder or healthy fats. The smoothies are easy to prepare, blending greens with water to a juice-like consistency before adding remaining ingredients. This structured approach ensures you stay hydrated and energized while supporting your body’s natural cleansing process. Each recipe is crafted to keep you satisfied and motivated throughout the cleanse.
Timing and Portion Control

Proper timing and portion control are essential for maximizing the benefits of the 10-Day Smoothie Cleanse. Participants should consume up to 60 ounces of smoothies daily, divided into two to three servings. Smoothies are typically enjoyed in the morning, mid-morning, and afternoon to maintain energy levels. Hydration is key, so drinking plenty of water throughout the day is recommended. Portion sizes can be adjusted based on hunger and fullness cues, ensuring you feel satisfied without overeating. For optimal results, smoothies should be spaced evenly every few hours to maintain steady nutrition and prevent cravings. Consistency in timing helps regulate digestion and supports the body’s detoxification process. Listen to your body and adjust portions as needed to ensure a comfortable and effective cleanse experience.

Common Challenges and Solutions
Cravings and detox symptoms are common challenges. Stay hydrated, plan snacks, and listen to your body. Manage hunger with healthy options and ease symptoms with rest and hydration.
Managing Cravings and Hunger

During the 10-Day Smoothie Cleanse, cravings and hunger can arise due to detoxification and reduced calorie intake. To manage these, incorporate healthy snacks like raw vegetables, nuts, or a small portion of fruit between smoothies. Staying hydrated is crucial—drink plenty of water throughout the day to suppress hunger pangs. Additionally, consider adding a scoop of plant-based protein powder to your smoothies to increase satiety. Planning meals in advance and keeping healthy alternatives on hand can also help curb cravings. Remember, the cleanse is about nourishment, not deprivation, so listen to your body and adjust as needed to maintain balance and comfort.
Overcoming Detox Symptoms
During the 10-Day Smoothie Cleanse, some individuals may experience detox symptoms like headaches, fatigue, or nausea as the body releases toxins. To alleviate these, stay hydrated by drinking plenty of water and consider incorporating herbal teas for comfort. Rest is essential—listen to your body and take breaks when needed. Mild exercise, such as walking, can also help reduce symptoms by promoting circulation. If symptoms persist, try adjusting your smoothie ingredients or adding a small portion of healthy fats like avocado or nuts for balance. Remember, these symptoms are temporary and indicative of the cleansing process. Patience and consistency will help you navigate this phase successfully.

Post-Cleanse Maintenance
After completing the cleanse, gradually reintroduce whole foods to maintain weight loss and energy. Continue incorporating smoothies into your diet for sustained health benefits and long-term success.
Reintroducing Foods After the Cleanse
After completing the 10-day smoothie cleanse, it’s crucial to gradually reintroduce solid foods to avoid digestive discomfort. Start with light, easily digestible foods such as steamed vegetables, lean proteins, and whole grains. Avoid processed foods, sugars, and high-fat items initially to maintain the cleanse’s benefits. Incorporate one new food at a time to monitor how your body reacts. Continue to include smoothies in your meals to ensure a smooth transition. Listen to your body and adjust your diet accordingly. This phased approach helps sustain weight loss, energy levels, and overall health while minimizing potential digestive issues.
Maintaining Healthy Habits Long-Term
Maintaining healthy habits after the 10-day smoothie cleanse requires a strategic and sustainable approach. Start by gradually incorporating smoothies into your daily routine, using them as a nutritious snack or meal replacement. Plan balanced meals with whole foods, including lean proteins, whole grains, and a variety of vegetables, ensuring a diverse diet that nourishes your body. Meal prepping can help you stick to healthy choices and avoid last-minute unhealthy decisions. Focus on overall well-being by including regular physical activity, mindfulness practices, and self-care to support mental health. Educate yourself on nutrition to make informed food choices and stay motivated. Building a support system, such as joining a health-focused community or finding a health buddy, can provide encouragement and accountability. Track your progress with a food diary or app to stay aware of your habits and celebrate small achievements. Set long-term goals and emphasize patience, understanding that lasting health requires consistent effort. Finally, embrace flexibility, allowing occasional treats without guilt to maintain a balanced and enjoyable lifestyle. By integrating these strategies, you can sustain the benefits of the cleanse and promote lasting well-being.