
Welcome! This comprehensive GE Universal Remote user guide will swiftly empower you to command your home entertainment system with ease and unparalleled convenience․
Today, 04/09/2026, marks the beginning of a streamlined, simplified control experience, thanks to your newly launched Ge Universal Remote Manual․
This manual is specifically designed to help you get started and provide a step-by-step guide for optimal performance․
What’s in the Box?
Upon opening your GE Universal Remote package, please verify that all the following components are present and accounted for․ Ensuring everything is included will guarantee a smooth and hassle-free setup process․ Inside the box, you should find the GE Universal Remote Control itself, meticulously designed for ergonomic comfort and intuitive operation․
Additionally, you’ll receive a detailed User Manual – this very document! – providing step-by-step instructions for programming, operation, and troubleshooting․ A Battery Door is pre-installed, ready for battery insertion․ Crucially, the package includes two AAA batteries, allowing you to power up your remote immediately upon unboxing․
Finally, you’ll discover a Quick Start Guide, offering a condensed version of the setup process for those eager to begin right away․ If any items are missing, please contact GE Customer Support immediately for assistance․ Retain the original packaging for potential warranty claims or returns․
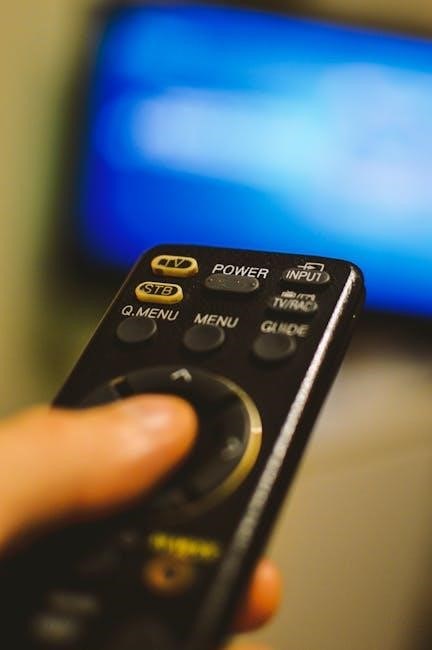
Remote Control Overview ― Buttons and Features
Your GE Universal Remote boasts a thoughtfully designed layout for effortless control․ The prominent Power Button instantly turns your connected devices on or off․ Volume Up/Down and Channel Up/Down buttons provide straightforward audio and channel navigation․ The Mute Button silences audio instantly, while the Input button allows seamless switching between connected devices․
Dedicated Number Buttons enable direct channel selection․ The Menu button accesses device-specific menus, and the Navigation Pad (Up, Down, Left, Right) facilitates intuitive menu control․ The OK/Select button confirms selections․ Mode Buttons (TV, DVD, AUX, etc․) pre-configure the remote for specific devices․
A Setup button initiates the programming process, and Macro buttons allow customized command sequences․ The remote also features a clear LCD Screen for displaying codes and settings․

Setting Up Your GE Universal Remote
Let’s begin! This section guides you through the initial setup, ensuring seamless device compatibility and efficient programming for a personalized entertainment experience․
Initial Setup & Battery Installation
Getting Started is Simple! Before diving into the world of unified remote control, a quick initial setup is required․ First, locate the battery compartment, typically on the back of the remote․ Gently slide open the compartment cover – avoid excessive force․
Insert the required batteries (usually AAA or AA, check the remote’s label for specifics), ensuring correct polarity as indicated by the + and – symbols inside the compartment․ Once the batteries are securely in place, close the compartment cover until it clicks shut․
Your Ge Universal Remote Manual is now ready for programming! A fresh set of batteries guarantees optimal performance and responsiveness․ If you encounter any issues, double-check the battery installation and consider replacing them with a new set․
Device Compatibility ౼ Supported Brands
Broad Compatibility for Seamless Control! The GE Universal Remote is engineered for extensive compatibility, aiming to simplify your entertainment setup․ It supports a vast array of brands, including major television manufacturers like Samsung, Sony, LG, and Vizio․
Beyond TVs, it extends to sound systems from Bose, Yamaha, and Sony, as well as streaming devices such as Roku, Apple TV, and Amazon Fire Stick․ Compatibility also encompasses DVD and Blu-ray players from Panasonic, Philips, and Pioneer․
For a comprehensive and up-to-date list, please refer to the GE Remote Code List resources (detailed later in this guide)․ While we strive for universal support, occasional devices may require manual code entry or may not be fully compatible․
Programming Methods ― Auto Code Search
Effortless Setup with Auto Code Search! This method is the quickest way to program your GE Universal Remote․ Begin by powering on the device you wish to control (e․g․, TV, DVD player)․ Then, press and hold the ‘Setup’ button on the remote until the indicator light illuminates․
Next, enter the device type code (TV, DVD, etc․) using the number buttons; The remote will then automatically begin cycling through pre-programmed codes․ Watch for your device to respond – when it does (e․g․, the TV turns off), immediately press the ‘Power’ button to lock in the code․
If the first code doesn’t work, the remote will continue searching․ Patience is key! If no code works, proceed to the Manual Code Entry method for more precise control․
Programming Methods ౼ Manual Code Entry
Precise Control with Manual Code Entry! If the Auto Code Search fails, this method offers a targeted approach․ First, power on the device you intend to control․ Press and hold the ‘Setup’ button until the indicator light activates, then input the corresponding device type code (TV, DVD, etc․) using the number buttons․
Consult the GE Universal Remote Code List (available online or in the included PDF) to find the specific code for your device’s brand and model․ Enter this five-digit code using the number buttons․ The indicator light should blink, confirming code entry․
Finally, test the code by pressing the ‘Power’ button․ If successful, the device will respond․ If not, repeat the process with another code from the list until functionality is achieved․

Using Your GE Universal Remote
Effortless Control Awaits! Now that setup is complete, enjoy seamless command over your entertainment devices with intuitive operation and advanced features․
Basic Operation ౼ Power, Volume, Channel
Powering On/Off: The most fundamental function! Simply press the red power button to toggle your connected device on or off․ Ensure the remote is pointed directly at the device for reliable signal transmission․
Volume Control: Adjust the audio level with the clearly marked volume up (+) and volume down (-) buttons․ Quick adjustments are possible with a single press, or hold for continuous change․
Channel Navigation: Seamlessly switch between channels using the channel up (CH+) and channel down (CH-) buttons․ Direct channel access is also available via the number pad – simply enter the desired channel number․
Mute Function: Instantly silence the audio by pressing the mute button․ Press again to restore the original volume level․ This is perfect for quick interruptions without losing your audio settings․
These core functions provide immediate control, allowing you to enjoy your favorite content without complication․ Mastering these basics unlocks the full potential of your GE Universal Remote․
Advanced Features ― Input Selection
Seamless Source Switching: The Input or Source button allows you to effortlessly navigate between connected devices – DVD players, gaming consoles, streaming boxes, and more! This eliminates the need to fumble with multiple remotes․
Dedicated Input Buttons: Some GE Universal Remotes feature dedicated input buttons (e․g․, HDMI1, HDMI2, Component)․ These provide one-touch access to your frequently used sources, streamlining your viewing experience․
Navigating the Input Menu: If your TV doesn’t have dedicated input buttons on the remote, pressing the Input/Source button will bring up an on-screen menu․ Use the arrow keys to highlight your desired input and confirm with ‘OK’․
Customizing Input Names: Certain models allow you to rename inputs for easier identification (e․g․, “Blu-ray Player” instead of “HDMI1”)․ Consult your remote’s specific programming instructions for details․
Mastering input selection unlocks the full potential of your home entertainment setup, providing a centralized control hub for all your devices․
Advanced Features ౼ Macro Programming
Automate Your Entertainment: Macro programming allows you to combine multiple commands into a single button press, simplifying complex operations․ Imagine turning on your TV, receiver, and selecting the correct input – all with one touch!
Recording a Macro: Typically, you’ll enter a “Macro” mode on your GE Universal Remote․ Then, you’ll press the buttons in the desired sequence (Power On TV, Input Selection, Volume Up, etc․)․ The remote records each command․
Saving and Triggering Macros: Once recorded, you’ll assign the macro to a specific button․ Now, pressing that button executes the entire sequence automatically․ This is ideal for movie nights or gaming sessions․
Editing and Deleting Macros: Most remotes allow you to edit existing macros to correct errors or adjust the command sequence․ You can also delete unwanted macros to free up memory․
Macro programming transforms your remote into a powerful automation tool, enhancing your viewing experience and saving you valuable time․
Advanced Features ౼ Favorite Channel Presets
Quick Access to Your Channels: The Favorite Channel Preset feature lets you instantly access your most-watched channels with dedicated buttons․ This eliminates endless scrolling through channel lists, providing a streamlined viewing experience․
Setting Up Presets: Typically, you’ll enter a “Preset” or “Favorite” mode on your GE Universal Remote․ Then, you’ll assign specific channel numbers to the preset buttons․ The process is usually straightforward and menu-driven․
Customization Options: Many GE remotes allow you to customize the number of preset buttons and even label them for easy identification․ This personalization enhances usability and convenience․
One-Touch Channel Access: Once configured, simply press the corresponding preset button to jump directly to your favorite channel․ This feature is particularly useful for live sports, news, or frequently viewed programs․
Favorite Channel Presets are a simple yet powerful way to optimize your viewing experience and enjoy instant access to your preferred content․

Troubleshooting Common Issues
Facing difficulties? This section provides solutions for typical problems, like unresponsive remotes, incorrect codes, or programming challenges, ensuring smooth operation․
Remote Not Responding
Is your GE Universal Remote failing to respond? Don’t worry, this is a common issue with a few simple fixes․ First, verify the batteries – ensure they are correctly installed with the proper polarity (+ and -) and are not depleted․ Try replacing them with a fresh set of alkaline batteries․
Next, check for obstructions between the remote and your device․ Ensure there’s a clear line of sight, free from any objects blocking the infrared signal․ Also, confirm the device is powered on and within range of the remote (typically up to 25 feet)․
If the issue persists, reset the remote by removing the batteries for several minutes, then reinserting them․ Finally, ensure you’ve selected the correct device using the device selection button before attempting to operate it․ If none of these steps resolve the problem, further troubleshooting may be needed․
Incorrect Code Entered
Experiencing issues after entering a code? An incorrect code is a frequent cause of remote malfunction․ If your GE Universal Remote isn’t controlling your device properly after programming, the entered code is likely the culprit․ Double-check the code against the GE code list for your specific device brand and model․
Remember that multiple codes may exist for a single device․ If the first code doesn’t work, try alternative codes listed for your brand․ Utilize online resources or the GE Remote Code List PDF to find the most accurate code․
Ensure accurate entry – carefully input each digit, avoiding errors․ If you’re still facing difficulties, consider repeating the programming process from the beginning, paying close attention to the code selection and entry steps․
Difficulty Programming Specific Devices
Struggling to program a particular device? Some devices, especially newer models or those from less common brands, can present programming challenges with your GE Universal Remote․ If the auto-code search fails or manual entry doesn’t yield results, don’t be discouraged!
Consult the GE online code database – it’s frequently updated with codes for recently released devices․ Alternatively, explore online forums and communities dedicated to universal remotes; other users may have successfully programmed the same device and can offer guidance․
Consider the device’s IR sensor; ensure it’s unobstructed and within range of the remote․ If problems persist, contact GE Customer Support for assistance – they may have specific instructions or updated codes․
GE Universal Remote Code List Resources
Locating the correct code is crucial for seamless operation! Explore online databases and the official GE Remote Code List PDF for comprehensive support․
Finding Your Device Code Online
Accessing device codes online offers a convenient and frequently updated resource for programming your GE Universal Remote․ GE maintains a searchable database on their official support website, allowing users to quickly identify the correct code for their specific television, DVD player, or other connected devices․
Simply navigate to the GE support section, locate the remote control code finder tool, and input your device’s brand and model number․ The system will then display a list of compatible codes․
Numerous third-party websites also compile extensive code lists, providing alternative options if you encounter difficulties on the official GE site․ Remember to verify the source’s reliability before entering any codes․ Regularly updated online resources ensure you have access to the latest codes, accommodating new devices and models as they are released․
Using the GE Remote Code List PDF
GE provides a comprehensive PDF version of their universal remote code list, offering an offline resource for programming your device․ This document organizes codes by brand, making it easier to locate the correct sequence for your television, sound system, or other electronics․
Download the latest PDF from the GE support website and save it to your computer or mobile device for convenient access․ Within the PDF, navigate to your device’s manufacturer and then select the appropriate model series․
The corresponding code(s) will be listed alongside․ Carefully follow the programming instructions in this user manual to enter the code into your GE Universal Remote․ Utilizing the PDF ensures you have a readily available reference, even without an internet connection․

Maintaining Your GE Universal Remote

Proper care extends the life of your remote! Regular cleaning and timely battery replacements ensure consistent, reliable performance for years to come․
Cleaning and Care
Maintaining a clean remote is crucial for optimal functionality and longevity․ Dust, dirt, and spills can interfere with button responsiveness and internal components․

To clean your GE Universal Remote, always begin by removing the batteries․ This prevents accidental activation during cleaning and potential damage to the circuitry․
Use a soft, dry cloth to wipe down the exterior of the remote․ For stubborn smudges or sticky residue, lightly dampen the cloth with water – never spray liquid directly onto the remote․
Avoid using harsh chemicals, abrasive cleaners, or solvents, as these can damage the plastic casing and markings․ A mild soap solution can be used sparingly on the cloth for tougher stains, followed by a wipe with a clean, damp cloth to remove any soap residue․

Pay particular attention to cleaning around the buttons, ensuring no debris is lodged underneath․ Store your remote in a cool, dry place when not in use to prevent dust accumulation and potential moisture damage․
Battery Replacement Guide
Maintaining power to your GE Universal Remote is simple! When the remote begins to exhibit reduced range, unresponsiveness, or erratic behavior, it’s likely time for fresh batteries․
Locate the battery compartment, typically on the back of the remote․ Gently slide or pop open the compartment cover․ Always remove the old batteries before inserting new ones․
Your remote requires two AAA or AA batteries (refer to your specific model’s documentation for confirmation)․ Ensure correct polarity when inserting the new batteries – match the positive (+) and negative (-) terminals as indicated inside the compartment․
Use high-quality alkaline batteries for optimal performance and longevity․ Avoid mixing old and new batteries, or different types of batteries․ Once the batteries are securely in place, close the battery compartment cover․
Dispose of used batteries responsibly, following local regulations for battery recycling․
GE Universal Remote Support & Warranty
Need assistance? GE provides comprehensive support resources and a valuable warranty to ensure your complete satisfaction with your new remote control․
Contacting GE Customer Support
For immediate assistance with your GE Universal Remote, our dedicated customer support team is readily available through multiple convenient channels․ You can reach us by phone at 1-800-661-1666, where our knowledgeable representatives will guide you through troubleshooting steps or answer any questions you may have regarding setup, programming, or operation․
Alternatively, you can explore our extensive online support portal at the official GE Appliances website (www․geappliances․com/support)․ Here, you’ll find a wealth of resources, including frequently asked questions (FAQs), detailed troubleshooting guides, downloadable manuals, and helpful video tutorials․
We also offer live chat support for real-time assistance from our experts․ Simply visit the support website and click on the chat icon to connect with a representative․ Our team is committed to providing prompt and effective solutions to ensure you enjoy a seamless experience with your GE Universal Remote․
Warranty Information
Your GE Universal Remote is backed by a one-year limited warranty against defects in materials and workmanship from the date of original purchase․ This warranty covers repair or replacement of the product, at GE’s discretion, should it prove defective under normal household use․
This warranty does not cover damage resulting from misuse, abuse, accidents, unauthorized repairs, or normal wear and tear․ To make a warranty claim, please retain your proof of purchase and contact GE Customer Support (see previous section for contact details)․
You will be required to provide the model number, serial number, and a detailed description of the defect․ GE will provide instructions for returning the product for inspection and repair or replacement․ Please note that shipping costs to and from the service center are the responsibility of the consumer․ This warranty gives you specific legal rights, and you may have other rights which vary by location․