loom knitting instructions for beginners pdf

Loom knitting is a fun and accessible craft for beginners, offering a creative outlet to make hats, scarves, and more. With versatile patterns and tutorials available, it’s easy to start your knitting journey using round or rectangular looms. Perfect for those new to knitting, loom knitting simplifies the process while still producing beautiful, professional-looking results. Explore free PDF guides and video lessons to master the basics and unlock endless project possibilities!

1.1 What is Loom Knitting?

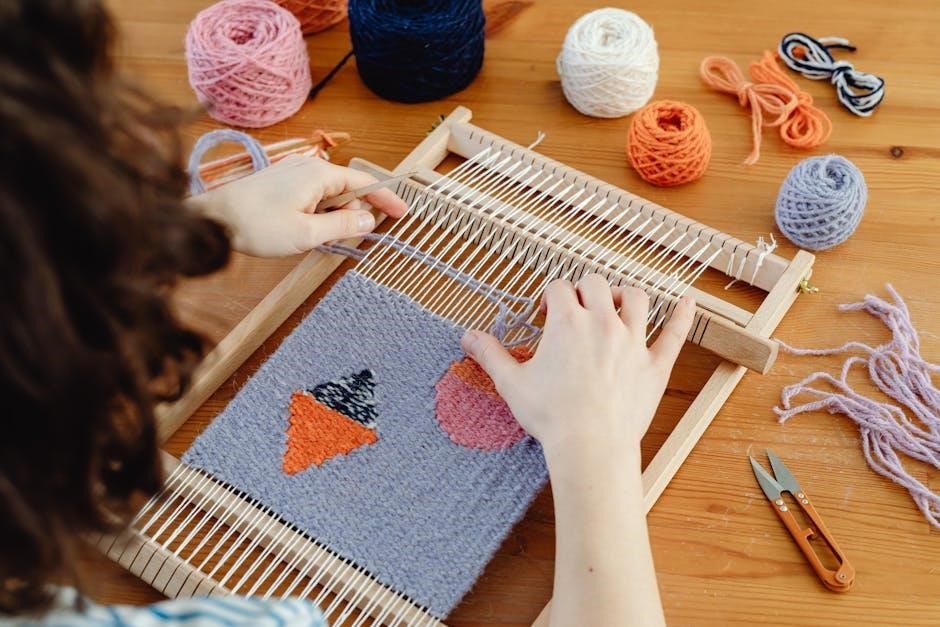
Loom knitting is a versatile and accessible method of creating knitted items using a loom tool. Unlike traditional knitting with needles, it uses pegs arranged in a frame to hold yarn loops. This technique simplifies the process, making it ideal for beginners. Loom knitting allows for the creation of a wide range of projects, from hats and scarves to blankets, with minimal equipment. It’s a fun and relaxing craft that offers creative freedom while producing professional-looking results with ease.

1.2 Benefits of Loom Knitting for Beginners

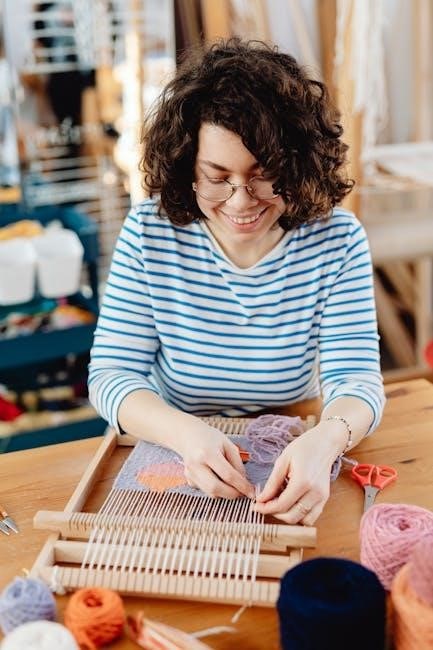
Loom knitting is an excellent choice for beginners, offering a fun and relaxing way to create knitted items. It requires minimal equipment, making it accessible and portable. With free PDF guides and video tutorials readily available, learning the basics is straightforward. This method allows for a wide range of projects, from scarves to hats, and is a great way to unwind while creating something meaningful. Its simplicity and versatility make it an ideal craft for those new to knitting.

Tools and Materials Needed

Essential tools include a loom (round or rectangular), loom hook, yarn needle, and yarn. Popular brands like Knifty Knitter and Boye offer starter-friendly options. Choose worsted-weight yarn for beginners, ensuring soft, elastic results. These basic materials are all you need to start your loom knitting journey and create various projects effectively.

2.1 Types of Looms (Round, Rectangular, etc.)

Round looms are ideal for creating circular projects like hats, while rectangular looms suit flat items such as scarves. Small looms, like the Knifty Knitter, are great for beginners, offering portability and ease of use. Rectangular looms are versatile, allowing for both flat and circular knitting. Loom sizes vary, with peg counts ranging from small (20 pegs) for baby hats to large (60+ pegs) for adult sweaters. Downloadable manuals for these looms are widely available in PDF formats, ensuring easy access to instructions for various projects.

2.2 Essential Accessories (Loom Hook, Yarn Needle, etc.)

A loom hook is indispensable for picking up stitches and weaving yarn efficiently. A yarn needle is necessary for sewing seams and weaving in ends. Measuring tape ensures accurate sizing, while scissors are handy for cutting yarn. Stitch markers help track progress, and a yarn cutter simplifies cutting yarn cleanly. These tools, often included in PDF guides, are essential for smooth, professional-looking results in loom knitting projects.

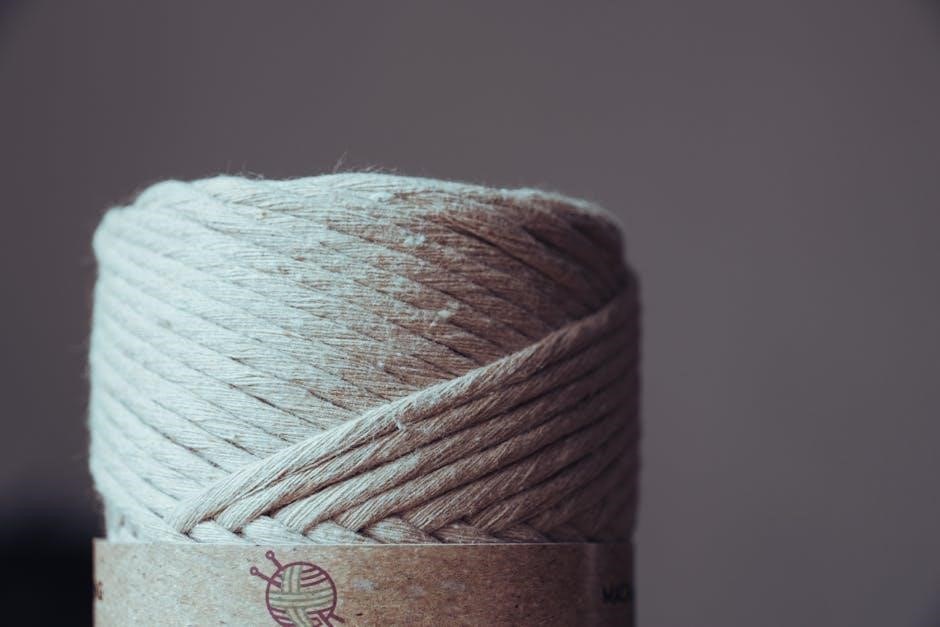
2.3 Choosing the Right Yarn for Beginners

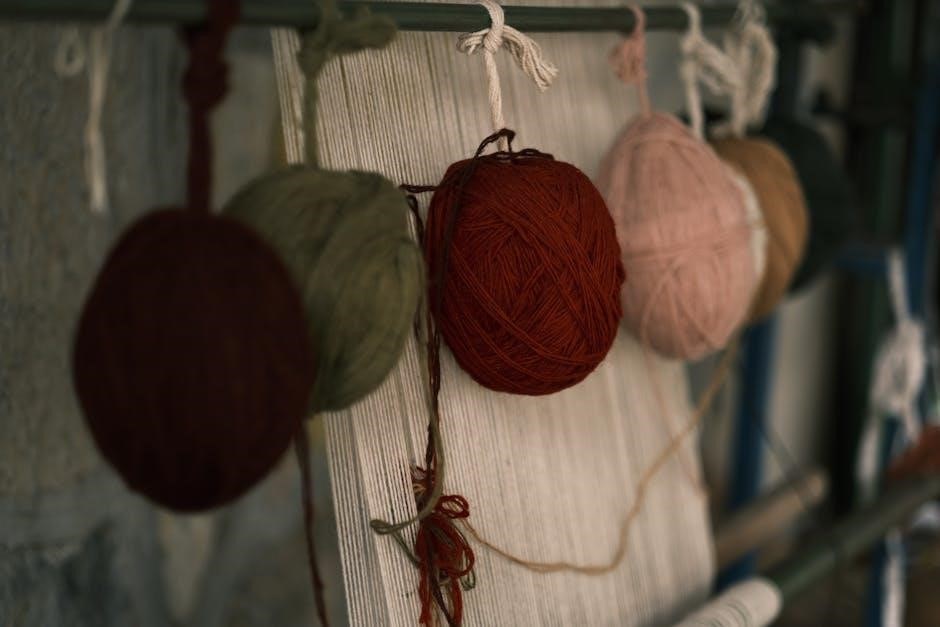
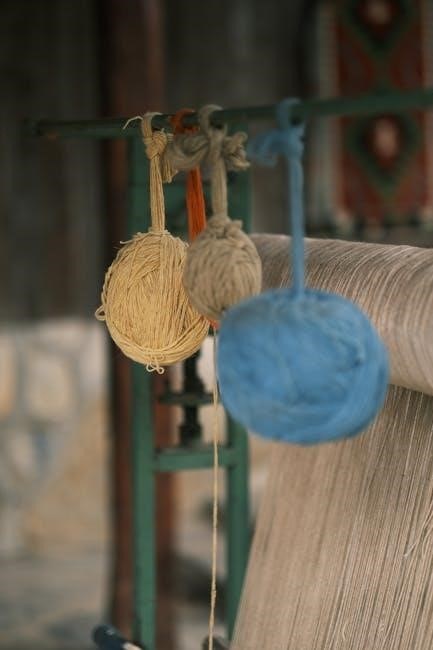
For beginners, selecting the right yarn is crucial. Worsted weight yarns are ideal for loom knitting due to their smooth texture and versatility. Acrylic yarns are soft, easy to care for, and affordable, making them perfect for starters. Cotton yarns are great for breathable projects like baby blankets or dishcloths. Consider using two strands of bulky yarn for quicker results, especially for hats or scarves. Always check the yarn label for recommended gauge and fiber content to ensure compatibility with your loom and project goals.

Basic Loom Knitting Techniques

Mastering basic techniques like casting on, single knitting, and binding off is essential for beginners. These foundational skills will help you create smooth, professional-looking projects with ease.

3.1 Casting On: Step-by-Step Guide

Casting on is the first step in loom knitting. Start by creating a slipknot and securing it to the first peg. Loop the yarn around each peg, maintaining even tension for a soft, elastic result. Ensure the yarn stays loose to avoid tight stitches. Practice this technique to master the foundation of your projects. This method works for both round and rectangular looms, providing a consistent start for beginners.

3.2 Single Knitting: The Foundation Stitch

Single knitting is the most basic stitch in loom knitting, creating a soft, smooth fabric. It involves working adjacent pegs in a forward or backward direction. Start by pulling the yarn from the first peg and looping it around the next peg, maintaining even tension. This stitch is perfect for beginners, as it teaches the fundamentals of stitch patterns and tension control. Practice this technique to build a solid foundation for more complex designs.

3.3 Binding Off: Securing Your Work

Binding off is the final step in loom knitting, securing your work to ensure it doesn’t unravel. Start by moving all loops to the last peg, then thread the yarn tail through the remaining loop using a yarn needle. Pull gently to tighten. For a neat finish, weave the yarn ends into the fabric. Proper binding off ensures a professional-looking project. This step is crucial for maintaining the integrity and shape of your knitted item.

Popular Patterns for Beginners

Popular beginner-friendly patterns include simple scarves, basic hats, and easy baby blankets. These projects are great for practicing fundamental stitches and techniques. Free PDF guides and video tutorials are widely available, offering step-by-step instructions to help you complete these rewarding projects successfully.

4.1 Simple Scarf Pattern

A simple scarf is an ideal first project for beginners. Using a round loom, you can create a stylish accessory by following easy step-by-step instructions; Start with single knitting stitches, which form the foundation of most patterns. Choose soft, worsted-weight yarn for a cozy finish. The pattern involves casting on, knitting rows, and binding off. Free PDF guides and video tutorials are available online, making it easy to learn and complete this rewarding project.

4.2 Basic Hat Pattern

A basic hat pattern is a great way to practice loom knitting skills. Using a round loom, beginners can create a cozy hat by following simple step-by-step instructions. Start with casting on, then use single knitting stitches to form the body. Choose a soft, medium-weight yarn for comfort. The pattern includes basic techniques like increases for shaping and binding off. Free PDF guides and tutorials are available, making it easy to complete this practical and rewarding project for all skill levels.

4.3 Easy Baby Blanket Pattern

An easy baby blanket pattern is a perfect project for beginners, requiring minimal tools and steps. Use a rectangular loom and soft, medium-weight yarn for a warm, cozy result. The pattern involves simple garter stitch or single knitting techniques. Cast on, knit rows, and bind off for a classic design. Ensure loose yarn tension for a soft texture. This pattern is ideal for gifts or nursery decor, offering a quick and rewarding experience for new knitters.

Advanced Techniques for Beginners

Explore advanced techniques like garter stitch for texture, drop stitch for openwork designs, and purl stitch to expand your skill set. These methods enhance your projects creatively.

5.1 Garter Stitch: Adding Texture

The garter stitch is a versatile technique that adds texture to your projects. By working rows of single knitting stitches, you create a ridged, fabric-like texture. It’s easy to learn and works well for beginners. This stitch is great for adding dimension to hats, scarves, and blankets. Simply knit row after row, ensuring loose yarn tension for a soft finish. The garter stitch is a perfect way to enhance your creations with a subtle, textured design.

5.2 Drop Stitch: Creating Openwork Designs

The drop stitch technique creates openwork designs by allowing selected loops to drop off the pegs, forming small holes or gaps. This method adds a decorative, airy texture to projects like scarves, shawls, or baby blankets. Beginners can master this stitch by following simple patterns that guide when and where to drop the loops. The result is a light, breathable fabric with a modern, eye-catching appearance, perfect for adding visual interest to various knitted items.

5.3 Purl Stitch: Expanding Your Skill Set

The purl stitch is a versatile technique that adds depth and texture to your knitting projects. Worked by wrapping the yarn in the opposite direction of the single knit stitch, it creates a smooth, ridged fabric. Perfect for beginners, the purl stitch enhances your skill set by introducing reverse stitching. It’s ideal for creating intricate patterns and adding visual interest to hats, scarves, and blankets. Practice this stitch to expand your creative possibilities and achieve professional-looking results.

Troubleshooting Common Mistakes

Identify and fix errors like uneven tension or dropped stitches by carefully checking each row. Adjust loose threads and tighten yarn to ensure a smooth, professional finish.

6.1 Identifying and Fixing Common Errors

Common errors in loom knitting include uneven tension, dropped stitches, and misaligned rows. To fix these, gently tug on the yarn to tighten loose stitches. For dropped stitches, use a yarn needle to carefully weave them back into place. Ensuring even tension is key to a professional finish. Regularly check your work to avoid mistakes that may require unraveling. Practice makes perfect, so don’t be discouraged by early errors—learn to identify and correct them for polished results.

6.2 Adjusting Tension for Better Results

Proper tension is crucial in loom knitting to ensure your projects lie flat and maintain their shape. If your stitches are too tight, your fabric may pucker; if too loose, it may sag. To adjust tension, gently pull the yarn after each row to keep it even. Check your work regularly to avoid unevenness. For beginners, using a consistent touch and medium-weight yarn can help achieve the right balance. Practice adjusting tension to perfect your knits!

6.3 Managing Yarn Ends and Loose Threads

Keeping your yarn ends organized is essential for a polished finish. After completing your project, use a yarn needle to weave in loose threads. Secure ends tightly to prevent unraveling. For beginners, it’s best to trim excess yarn close to the fabric. Regularly checking your work and tucking in ends as you go can save time later. Refer to your PDF guide for step-by-step instructions on managing yarn ends effectively for professional-looking results.

Additional Resources

Explore comprehensive PDF guides, video tutorials, and online communities to enhance your loom knitting skills. These resources offer step-by-step instructions and tips perfect for beginners.

7.1 Recommended PDF Guides for Beginners

Discover essential PDF guides tailored for beginners, such as the Round Loom 100 FREE Loom Knitting Patterns and Knifty Knitter Instructions PDF. These resources offer detailed step-by-step instructions, covering loom types, stitches, and project assembly. The How to Loom Knit PDF provides a 9-lesson class with photo tutorials and patterns, perfect for mastering the basics. These guides are designed to help you learn efficiently and confidently, ensuring a smooth start to your loom knitting journey.

7.2 Online Tutorials and Video Lessons

Enhance your learning with online tutorials and video lessons designed for beginners. Platforms like YouTube and crafting websites offer step-by-step guides, covering basic stitches and patterns. Video lessons provide visual demonstrations, making it easier to master techniques like casting on and binding off. Tutorials such as the Romantic Hat and Microwavable Bowl Cozy projects offer practical, hands-on experience. These resources are ideal for visual learners, helping you troubleshoot common mistakes and refine your skills in a interactive and engaging way.

7.3 Joining Loom Knitting Communities

Joining loom knitting communities connects you with fellow crafters, offering support, tips, and inspiration. Online forums, social media groups, and dedicated platforms like Facebook or Ravelry provide spaces to share projects and gain feedback. These communities often feature tutorials, pattern exchanges, and encouragement, helping you stay motivated and improve your skills. Engaging with others who share your passion fosters creativity and helps you overcome challenges, making your knitting journey more enjoyable and rewarding.

Next Steps in Your Loom Knitting Journey

After mastering the basics, explore more complex patterns, customize projects with unique yarns, and share your creations online. Join communities for inspiration and feedback, and consider teaching others to deepen your understanding. Experiment with advanced stitches and techniques to expand your skill set, ensuring a fulfilling and creative loom knitting experience that continues to grow and evolve with your passion for the craft.

8.1 Exploring More Complex Patterns

Move beyond basics by exploring intricate designs like cables, Fair Isle, or lace patterns. Try projects such as textured blankets or stylish sweaters. Use PDF guides to learn advanced stitches like garter, drop, or purl variations. Experiment with multi-color yarns and unique blends to add depth to your work. Video tutorials can help master these techniques, while online communities offer inspiration and tips for creating complex yet beautiful pieces tailored to your skill growth.

8.2 Customizing Your Projects

Personalize your creations by experimenting with yarn colors, textures, and stitch combinations. Add unique embellishments like buttons or embroidery for a personal touch. Mix different yarn weights or blend colors to create one-of-a-kind designs. Use online patterns as a base and adapt them to your style. Free PDF guides often include tips for modifying projects, allowing you to express your creativity and make each piece truly special.

8.3 Sharing Your Creations

Share your finished projects with friends, family, or online communities to showcase your skills. Join forums or social media groups dedicated to loom knitting to connect with fellow crafters. Consider selling your creations or gifting them to loved ones. Many free PDF guides include tips on presenting your work professionally. Sharing your projects can inspire others and provide valuable feedback to help you grow as a crafter. Embrace the joy of creating and connecting through your handmade items.

overdrive manual transmission

Overdrive in manual transmissions is a gear ratio higher than 1:1‚ designed to reduce engine RPM at cruising speeds‚ enhancing fuel efficiency and performance. It is typically activated above 35-40 MPH‚ offering a smoother driving experience.

What is Overdrive in a Manual Transmission?

Overdrive in a manual transmission is a gear ratio higher than 1:1‚ designed to reduce engine RPM during high-speed cruising. It operates by altering the gear ratio to decrease engine speed‚ typically by around 30%‚ while maintaining vehicle speed. This feature is particularly useful for highway driving‚ where it enhances fuel efficiency and reduces engine wear. Overdrive is usually activated manually or automatically once the vehicle exceeds a certain speed‚ often around 35-40 MPH; In manual transmissions‚ overdrive is typically the highest gear available‚ though some systems may offer multiple overdrive gears for smoother power delivery. It is an optional feature that drivers can engage or disengage based on driving conditions‚ providing greater control and flexibility. Overdrive units are often integrated into the transmission or mounted between the gearbox and the rear axle‚ ensuring seamless operation without compromising the manual shifting experience. This mechanism allows drivers to enjoy the benefits of both performance and efficiency‚ making it a popular choice in modern and classic vehicles alike.

Benefits of Using Overdrive in Manual Transmissions

Overdrive in manual transmissions offers several benefits‚ primarily enhancing fuel efficiency and reducing engine wear. By lowering engine RPM during high-speed cruising‚ overdrive reduces stress on the engine‚ leading to improved longevity. This feature is particularly advantageous for highway driving‚ where it minimizes fuel consumption and provides a quieter‚ smoother ride. Additionally‚ overdrive allows drivers to maintain consistent speeds without constant gear shifting‚ making long-distance driving more comfortable. It also helps in reducing exhaust emissions by optimizing engine performance at higher speeds. For vehicles with smaller engines‚ overdrive is especially beneficial as it enables them to maintain speed without overworking the engine. Overall‚ overdrive contributes to a more efficient and enjoyable driving experience‚ making it a valuable component in modern and classic manual transmissions alike. Its ability to balance performance and economy has made it a sought-after feature for drivers seeking both power and practicality.

Historical Development of Overdrive in Manual Transmissions

The concept of overdrive in manual transmissions dates back to the early 20th century‚ with early systems focusing on reducing engine RPM during high-speed cruising. Initially‚ overdrive was achieved through mechanical systems that provided an additional high gear ratio. In the 1930s‚ the Borg Warner Electric Overdrive became a pioneering innovation‚ offering a more refined and user-friendly solution. This system‚ first introduced in the 1952 Plymouth car line‚ marked a significant milestone by integrating an electrically operated overdrive unit into manual transmissions. It allowed drivers to engage overdrive effortlessly‚ enhancing fuel efficiency and comfort. Over time‚ overdrive technology evolved‚ with manufacturers developing more sophisticated manual transmissions that incorporated multiple overdrive gears. These advancements were particularly influential in sports cars‚ where maintaining performance at higher speeds was crucial. The historical development of overdrive reflects a continuous pursuit of efficiency and performance‚ shaping its role in modern manual transmissions. Its legacy remains evident in the design of contemporary gearboxes‚ where overdrive continues to play a vital role in optimizing engine performance and driver comfort.

Activation Speed of Overdrive in Manual Transmissions

Overdrive in manual transmissions typically activates once the vehicle reaches a specific speed‚ commonly around 35 to 40 MPH. This ensures that the system engages only during cruising conditions‚ where the benefits of reduced engine RPM are most pronounced. Activation is often controlled by a button or a mechanical linkage‚ allowing the driver to manually engage or disengage the overdrive gear. In some systems‚ the overdrive is automatically activated based on speed and throttle input‚ eliminating the need for manual intervention. The mechanism relies on sensors and solenoids to adjust the gear ratio seamlessly‚ providing a smooth transition that minimizes disruptions to the driving experience. This intelligent activation ensures that overdrive operates efficiently‚ enhancing fuel economy and reducing engine wear without compromising performance during acceleration or lower-speed driving. The ability to activate overdrive at higher speeds makes it particularly advantageous for highway driving‚ where maintaining lower RPM levels is beneficial for both efficiency and comfort.

Known Manual Overdrive Transmission Options

Several manual transmissions are well-known for their overdrive functionality‚ offering enhanced fuel efficiency and reduced engine wear. The NV3500‚ commonly found in Chevrolet 1500 trucks‚ is a popular choice for its durability and smooth shifting. Another option is the T5 transmission‚ widely used in vehicles like the Astro Van and S10‚ known for its lightweight design and ease of maintenance. The New Process A-833‚ often referred to as RPO MY6‚ is another notable manual overdrive transmission‚ frequently seen in classic Chevy C10s. These transmissions are favored for their ability to provide an additional gear ratio higher than 1:1‚ allowing drivers to cruise at lower RPMs during highway driving. Each of these options has its unique characteristics‚ catering to different vehicle types and driving preferences. Whether for daily commuting or performance driving‚ these manual overdrive transmissions offer a reliable and efficient solution for drivers seeking improved fuel economy and reduced engine strain.

Overdrive manual transmissions remain vital for enhancing fuel efficiency and performance. Future advancements aim to integrate smarter technologies‚ optimizing gear ratios and driver experience while maintaining the simplicity and control drivers appreciate in manual systems.

How Overdrive Reduces Engine RPM

Overdrive reduces engine RPM by altering the gear ratio to a value higher than 1:1‚ allowing the engine to operate at a lower speed relative to the vehicle’s cruising speed. This reduction in RPM is achieved by increasing the ratio of the output shaft speed to the engine speed‚ effectively decreasing the engine’s workload. For instance‚ if the overdrive gear ratio is 0.7:1‚ the engine RPM drops by about 30% compared to the input shaft speed. This mechanism is particularly beneficial during highway driving‚ where maintaining high speeds at lower RPM levels enhances fuel efficiency and reduces engine wear. The overdrive unit achieves this by changing the gear ratio‚ ensuring that the engine operates within its optimal RPM range‚ even at elevated vehicle speeds. This seamless transition not only improves driving comfort but also contributes to better overall vehicle performance and longevity.

Maintenance Tips for Overdrive Manual Transmissions

Regular maintenance is crucial for the longevity and performance of overdrive manual transmissions. Start by checking the transmission fluid level regularly to ensure it is within the recommended range‚ as low fluid levels can lead to premature wear. Inspect the linkage and levers connected to the transmission for any signs of wear or misalignment‚ as these can affect the overdrive’s engagement. Lubricate the shift linkage and other moving parts periodically to maintain smooth operation. Additionally‚ monitor the overdrive solenoid or electrical components‚ especially in modern vehicles‚ to ensure proper activation and deactivation. Avoid aggressive driving habits‚ such as rapid shifting or riding the clutch‚ which can strain the overdrive mechanism. If you notice unusual noises or difficulty engaging gears‚ have the transmission inspected by a professional. Finally‚ always follow the manufacturer’s recommended service intervals and guidelines for fluid changes and inspections to keep your overdrive manual transmission functioning optimally.

Future of Overdrive Technology in Modern Vehicles

Overdrive technology in modern vehicles is expected to evolve significantly‚ focusing on enhanced efficiency and seamless integration with advanced drivetrain systems. As automakers prioritize fuel efficiency and reduced emissions‚ overdrive manual transmissions will likely incorporate smarter gear ratios and adaptive systems. These systems will optimize performance based on driving conditions‚ ensuring optimal engine RPM reduction during cruising. The integration of electric vehicles (EVs) and hybrid powertrains may also influence overdrive designs‚ with gearsets tailored to work alongside electric motors for smoother transitions and improved range.

Future transmissions may feature advanced materials and coatings to reduce friction and wear‚ enhancing durability. Electronic controls and AI-driven systems could predict driver behavior‚ preemptively engaging overdrive for better fuel economy. Additionally‚ the rise of autonomous vehicles may further refine overdrive functionality‚ ensuring ultra-smooth operation in self-driving modes. Overall‚ the future of overdrive manual transmissions lies in blending traditional mechanical excellence with cutting-edge technology to meet the demands of modern automotive innovation.

Comparison of Manual and Automatic Overdrive Systems

Manual and automatic overdrive systems differ primarily in how they engage and manage the overdrive function. Manual overdrive systems require driver input‚ typically through a button or lever‚ to activate the highest gear ratio‚ reducing engine RPM during cruising. This hands-on approach allows for better control‚ especially in situations requiring quick gear changes‚ but it demands more driver awareness and skill. Automatic overdrive systems‚ on the other hand‚ use electronic controls to automatically engage and disengage the overdrive based on speed and throttle input‚ offering seamless operation without driver intervention.

Automatic systems are generally more convenient and smoother in operation‚ particularly in stop-and-go traffic or varying road conditions. However‚ manual systems provide a more direct connection to the vehicle‚ appealing to driving enthusiasts. Both systems aim to enhance fuel efficiency and reduce engine wear‚ but their implementation and user interaction are distinct. As modern vehicles lean toward automation‚ automatic overdrive systems are becoming more prevalent‚ while manual systems remain popular among purists who value driver involvement.

brother label maker instructions

Brother Label Makers are versatile tools designed for creating high-quality, customizable labels. They offer portability, ease of use, and various features for personal or professional use.

1.1 Unboxing and Initial Setup

When you unbox your Brother label maker, you’ll find the device, a battery compartment, and a quick-start guide. Begin by removing the protective cover and installing the batteries as indicated. For models with an AC adapter, plug it in to ensure continuous power. Next, load the label tape by inserting it into the tape compartment, ensuring it clicks into place. Finally, power on the device and follow the on-screen instructions to set your preferences, such as language and units. If using a mobile app, download the Brother iPrint&Label app to connect your label maker to your smartphone or tablet for enhanced functionality. This setup process ensures your label maker is ready for immediate use.

1.2 Inserting Batteries and Basic Components

To power your Brother label maker, remove the battery compartment cover and insert the recommended batteries, ensuring the polarities match the diagram. For models with an AC adapter, plug it in for continuous use. If using batteries, avoid mixing old and new ones for optimal performance. Next, install the label tape by opening the tape compartment, aligning the tape with the guide, and closing it securely. Gently pull the tape to ensure it feeds correctly. Always use genuine Brother tapes for compatibility and quality. Once powered on, test the device by printing a sample label. If using an AC adapter, ensure it’s firmly connected to both the device and a power outlet. Proper installation ensures smooth operation and prevents damage. Consult your manual for specific model instructions.

Popular Brother Label Maker Models

Brother offers various label maker models, including the PT-9700PC, PT-9800PCN, and PT-P900W, known for their high-speed printing, wide label capabilities, and wireless connectivity options.

2.1 Brother PT-9700PC

The Brother PT-9700PC is a high-end label maker designed for industrial use, offering fast printing speeds and compatibility with wide labels. It supports PC connectivity and features a built-in cutter for precise label trimming. The PT-9700PC is ideal for heavy-duty applications, allowing users to create durable, laminated labels that withstand harsh environments. It also includes advanced features like automatic label length detection and multiple font styles. With its robust design and user-friendly interface, this model is a favorite among professionals needing reliable and efficient labeling solutions.

2.2 Brother PT-9800PCN

The Brother PT-9800PCN is a robust label maker designed for high-volume labeling needs. It features network connectivity via Wi-Fi and Ethernet, making it ideal for office environments. With a color display and a QWERTY keyboard, it offers an intuitive user experience. This model supports wide labels, up to 30mm, and is compatible with Brother’s DK tapes. The PT-9800PCN is perfect for industrial and professional settings, allowing users to create durable, laminated labels. It also includes advanced features like automatic label cutting and customizable fonts. Its robust design and high-speed printing capabilities make it a reliable choice for businesses requiring efficient and professional labeling solutions. The PT-9800PCN integrates seamlessly with Brother’s labeling software, enhancing its functionality for complex labeling tasks.

Customizing Labels

Customizing labels is simple with Brother label makers, allowing users to change fonts, add symbols, and adjust margins for professional and personalized results.

3.1 How to Change the Font on a Brother P-Touch Label Maker

To change the font on a Brother P-Touch label maker, use the built-in display or connect it to a computer. Access the font settings via the ControlCenter software or the Brother iPrint&Label app. Select your preferred font style and size, then preview the label. Save the settings to apply the changes. For mobile devices, download the Brother iPrint&Label app, sync your label maker, and adjust fonts directly from the app. Ensure your label maker is updated with the latest firmware for optimal performance. This feature enhances customization, making your labels more professional and visually appealing.

  • Access font options via software or app.
  • Select and preview your preferred font;
  • Save changes for professional results.

3.2 How Margins Work on a Brother Label Maker

Margins on Brother label makers determine the spacing around the text, ensuring labels fit neatly on the tape. The label maker automatically adjusts margins based on the selected font size and label length. Users can also manually adjust margins for custom layouts. Proper margin settings prevent text from being cut off and optimize tape usage. To set margins, navigate to the settings menu, choose the label size, and adjust the margins as needed. This feature ensures professional-looking labels with consistent spacing. Adjusting margins is especially useful for fitting specific content or designing visually appealing labels. Always preview labels before printing to confirm margin accuracy and avoid waste.

  • Auto adjusts based on font and size.
  • Manual adjustments for custom layouts.
  • Prevents text cutoff and optimizes tape.

Connectivity Options

Brother label makers offer versatile connectivity options, including USB, Wi-Fi, and mobile device connections via the Brother iPrint&Label app, ensuring seamless label printing from various devices.

4.1 Connecting Your Brother Label Maker to a Computer

To connect your Brother label maker to a computer, start by installing the full driver and software package from the Brother downloads website. Ensure your model is selected, then download the appropriate driver for your operating system. Once installed, use a USB cable to connect the label maker to your computer. Open the Brother P-Touch software to create and print labels. For wireless models, you may also configure the connection via WiFi using the Brother ControlCenter. Always ensure the label maker is turned on and properly recognized by your system. If issues arise, check the USB connection or reinstall the driver. This setup allows seamless label printing from your computer.

4.2 Connecting Your Brother Label Maker to Mobile Devices

To connect your Brother label maker to mobile devices, download the Brother iPrint&Label app from the App Store or Google Play. Ensure your label maker and mobile device are on the same WiFi network. Open the app, select your Brother model, and follow in-app instructions to establish a connection. For direct wireless models like the PT-P900W, enable WiFi on the label maker and pair it with your device. The app allows you to design and print labels seamlessly. Compatible with both iOS and Android, this setup is ideal for on-the-go labeling. Test the connection by printing a sample label to confirm functionality.

Troubleshooting and Maintenance

Regularly clean the Brother label maker to ensure optimal performance. Use Brother-approved tapes and update software for smooth operation. Troubleshoot connectivity issues by resetting the device.

5.1 Common Issues and Solutions

Common issues with Brother label makers include poor print quality, connectivity problems, and paper jams. To resolve print quality issues, ensure genuine Brother tapes are used and the cutter is clean. For connectivity problems, restart the device and check network settings. Paper jams can be fixed by turning off the label maker, allowing it to cool, and gently removing the jammed tape. Regular maintenance, such as cleaning the printhead and updating software, can prevent many issues. Refer to the user manual for detailed troubleshooting steps. Always use Brother-approved supplies for optimal performance and longevity of the device.

5.2 Cleaning and Maintaining Your Brother Label Maker

Regular cleaning and maintenance are essential for optimal performance of your Brother label maker. Start by turning off the device and allowing it to cool. Use a soft, dry cloth to wipe the cutter and printhead, ensuring no debris or residue remains. For more thorough cleaning, gently use compressed air to remove dust from internal components. Avoid using liquids or harsh chemicals, as they may damage the machine. Additionally, check and update the firmware periodically to ensure compatibility and functionality. Proper maintenance prevents jams, ensures crisp prints, and extends the lifespan of your label maker. Refer to your user manual for specific cleaning instructions tailored to your model.

12 week hyrox training plan pdf

HYROX combines 8km of running with 8 functional workout stations, creating an inclusive, challenging event for all fitness levels. A 12-week training plan helps athletes build endurance, strength, and mental grit for competition.

What is HYROX?

HYROX is an indoor fitness competition blending 8km of running with 8 functional workout stations. It alternates between 1km runs and exercises like sled pushes and burpees, testing endurance, strength, and mental grit. Designed for all fitness levels, HYROX offers categories from beginners to elites. Its standardized format ensures consistency across global events, unlike CrossFit. With over 80 races in 2025, HYROX has grown rapidly since its 2017 debut in Germany, attracting 550,000 athletes and 350,000 spectators. The event emphasizes inclusivity, with 99% of participants finishing. Proper gear, like hybrid shoes, is essential. HYROX’s predictable structure makes it accessible yet challenging, embodying its motto as “The World Series of Fitness Racing.”

Structure of a HYROX Competition

A HYROX competition consists of 8 rounds, each featuring a 1km run followed by a functional workout station. Athletes alternate between running and exercises like sled pushes, burpees, and rowing, totaling 8km of running and 8 stations. The standardized format ensures consistency across all global events, unlike CrossFit. Each race is completed indoors, with participants receiving an official time after finishing all 16 segments. The average completion time is around 1.5 hours, with over 95% of athletes finishing. The event is designed for all fitness levels, making it inclusive and accessible while maintaining a competitive edge. HYROX’s structured format appeals to both elite athletes and beginners, fostering a dynamic and challenging environment for all participants.

12-Week HYROX Training Plan Overview

This structured 12-week plan progressively builds endurance, strength, and functional capacity, balancing running and workouts to maximize race performance for all fitness levels.

Objective of the Training Plan

The 12-week HYROX training plan is designed to prepare athletes for the demands of the HYROX race, focusing on building endurance, strength, and functional capacity. The program is structured to gradually increase intensity and volume, ensuring athletes peak at the right time. By balancing running, functional workouts, and recovery, the plan aims to enhance overall fitness and mental resilience. It emphasizes progressive overload to improve performance safely and effectively, while also incorporating race-specific drills to familiarize athletes with the competition format. The ultimate goal is to equip participants with the physical and mental readiness needed to excel in the HYROX race, regardless of their starting fitness level.

Key Components of the Plan

The 12-week HYROX training plan consists of structured phases designed to enhance endurance, strength, and functional capacity. It incorporates a mix of running, functional workouts, and recovery strategies to ensure balanced progress. The plan emphasizes progressive overload, gradually increasing intensity and volume to avoid plateaus. Functional exercises mimic HYROX stations, such as sled pushes and rowing, to build specific skills. Nutrition and recovery are also highlighted to support performance and prevent injury. Race-specific drills and mental preparation are integrated to familiarize athletes with competition conditions. The plan is tailored to suit all fitness levels, ensuring a comprehensive approach to achieving peak race readiness.

Phase 1: Building a Foundation (Weeks 1-4)

Phase 1 focuses on building endurance and strength through foundational exercises. It introduces athletes to HYROX-style workouts, combining running with functional movements to establish a solid base.

Weeks 1-2: Endurance and Strength Basics

These initial weeks focus on establishing a solid fitness base. Athletes begin with shorter runs (1-2km) alternated with basic functional exercises like squats, lunges, and rowing. The goal is to build cardiovascular endurance and muscular strength gradually. Workouts are structured to introduce the HYROX format, ensuring athletes adapt to the demands of alternating running and exercises. Consistency is key, with 3-4 sessions per week. Nutrition and recovery are also emphasized to support progress. By the end of Week 2, athletes should feel more comfortable with the workout structure and ready to increase intensity in the following phases. This foundation is crucial for long-term success in the HYROX competition.

Weeks 3-4: Progressive Overload and Skill Development

During Weeks 3-4, the focus shifts to increasing intensity through progressive overload. Athletes introduce heavier weights or more repetitions in functional exercises, such as sled pushes or weighted lunges, to build strength. Running distances are extended slightly, and workout stations become more dynamic, incorporating skills like medicine ball throws and rowing sprints; This phase emphasizes proper technique to avoid injury and improve efficiency. Athletes also practice transitioning smoothly between running and exercises, simulating race conditions. Recovery remains a priority, with active rest days and mobility work. By Week 4, athletes should notice improvements in both endurance and strength, setting a strong foundation for the next phase of training.

Phase 2: Building Intensity (Weeks 5-8)

Weeks 5-8 focus on increasing running distance and functional intensity. Athletes simulate race conditions, enhancing endurance and mental toughness while refining skills for competition.

Weeks 5-6: Increasing Running Distance and Functional Work

During Weeks 5-6, the training plan emphasizes progressively increasing running distance and intensity. Athletes will transition from shorter runs to longer, more sustained efforts, building cardiovascular endurance. Functional workouts become more dynamic, incorporating exercises like sled pushes, weighted lunges, and rowing. The focus is on improving power output and muscular stamina while maintaining proper form. These weeks introduce race-pace simulations to acclimate athletes to competition conditions. Coaches emphasize progressive overload, ensuring athletes challenge themselves without risking injury. Recovery sessions are integrated to support adaptation. This phase balances running and functional work, preparing athletes for the demands of HYROX while fostering mental resilience and strategic pacing.

Weeks 7-8: Simulating Race Conditions

Weeks 7-8 focus on simulating the actual HYROX race format to build race-specific fitness and mental toughness. Athletes perform full-distance runs of 1km followed by functional exercises, mimicking competition conditions. The intensity increases, with reduced rest periods between stations to replicate race-day pacing. Coaches emphasize proper transition techniques and nutrition strategies. Functional workouts are tailored to mirror HYROX stations, such as sled pushes, weighted lunges, and rowing, to improve efficiency and speed. Mental preparation becomes a priority, with drills to practice focus, pacing, and overcoming fatigue. These weeks ensure athletes are fully prepared for the physical and mental demands of the HYROX event, fostering confidence and readiness to compete at their best.

Phase 3: Peak Performance (Weeks 9-11)

Phase 3 focuses on maximizing endurance, intensity, and race-specific strategies. Athletes refine their skills, increase workout intensity, and practice race-day strategies to peak performance for competition.

Weeks 9-10: Maximizing Endurance and Functional Capacity

During weeks 9-10 of the HYROX training plan, the focus shifts to maximizing endurance and functional capacity. Workouts intensify, with longer runs and more challenging functional exercises to simulate race conditions. Athletes perform high-intensity interval training (HIIT) to boost cardiovascular endurance and muscular stamina. Functional workouts target core strength, agility, and power, ensuring athletes can handle the demands of the competition. Progressive overload is introduced to push limits, while skill refinement ensures efficiency in movements. Recovery strategies, such as active rest and mobility drills, are emphasized to prevent overtraining. This phase prepares athletes to peak at the right time, blending endurance, strength, and mental resilience for optimal race performance;

Week 11: Race-Specific Drills and Strategy

Week 11 focuses on race-specific drills and strategy to fine-tune performance. Athletes practice race simulations, transitioning smoothly between running and functional exercises. Emphasis is placed on perfecting techniques under race-like conditions, such as managing pacing and mental focus. Drills include timed intervals, mock race starts, and finish line sprints to build mental toughness. Strategy sessions cover nutrition, hydration, and gear preparation for race day; Athletes also work on visualization techniques to enhance performance under pressure. This phase ensures athletes are mentally and physically prepared to execute their best on race day, with a focus on reducing unnecessary physical stress to avoid burnout.

Phase 4: Taper and Race Preparation (Week 12)

Phase 4 focuses on tapering and race preparation during Week 12. Training volume is reduced to enhance recovery and mental preparation. Athletes fine-tune race day strategies to ensure peak performance.

Reducing Volume and Enhancing Recovery

During Week 12, the training plan emphasizes reducing overall volume to allow the body to recover and adapt. This phase focuses on tapering, where the intensity and frequency of workouts are scaled back to prevent overtraining. Recovery strategies such as stretching, foam rolling, and adequate nutrition are prioritized to ensure optimal physical readiness. Mental recovery is also addressed, with techniques like visualization and relaxation to maintain focus. The goal is to balance rest with light, race-specific drills to preserve fitness levels. By minimizing fatigue, athletes can approach race day with maximum energy and mental clarity, ensuring they are prepared to perform at their best.

Mental Preparation and Race Day Strategy

Mental preparation is crucial during the final week of training. Techniques such as visualization, positive affirmations, and mindfulness are employed to build confidence and resilience. Athletes learn to break down the race into manageable segments, focusing on one interval at a time. Race day strategy involves pacing, ensuring consistent effort during runs and functional exercises. Proper hydration, nutrition, and gear preparation are emphasized to minimize distractions. The plan encourages athletes to simulate race conditions in training, fostering adaptability and composure under pressure. By refining both mental and strategic approaches, participants can optimize their performance and achieve their best possible results on race day.

primo bottom load water dispenser manual

The Primo Bottom Load Water Dispenser offers a convenient and sleek solution for hydration needs, featuring a bottom-loading design for easy bottle replacement and minimal spills.

1.1 Overview of the Primo Bottom Load Water Dispenser

The Primo Bottom Load Water Dispenser is a high-quality, user-friendly appliance designed for convenient water dispensing. Its bottom-loading design allows for easy bottle replacement without spills, making it ideal for home or office use. The dispenser supports standard 3, 4, or 5-gallon water bottles and features a sleek, durable stainless steel construction. It includes advanced controls for dispensing hot and cold water, ensuring versatility for various hydration needs. With its space-saving design and energy-efficient operation, the Primo Bottom Load Water Dispenser offers a practical solution for staying hydrated while maintaining a modern aesthetic.

1.2 Key Features and Benefits

The Primo Bottom Load Water Dispenser boasts a sleek design and advanced functionality. Key features include a bottom-loading system for easy bottle replacement, touch-sensitive controls for hot and cold water, and an energy-saving switch to reduce power consumption. The dispenser supports 3, 4, and 5-gallon bottles, making it versatile for various needs. Its stainless steel construction ensures durability, while the child safety lock prevents accidental hot water dispensing. Additional benefits include a user-friendly interface, low noise operation, and a modern aesthetic that fits seamlessly into any setting, ensuring convenience and efficiency for home or office use.

Installation and Setup

Proper assembly and installation are crucial. Begin by unboxing and placing the dispenser on a flat surface. Connect all components as per the manual instructions.

2.1 Unboxing and Initial Setup

Begin by carefully unboxing the Primo Bottom Load Water Dispenser and placing it on a flat, stable surface. Inspect all components, including the dispenser, user manual, power cord, probe assembly, and tubing, to ensure nothing is damaged or missing. Before proceeding, read the manual thoroughly to understand the setup process. Locate the model number on the back of the dispenser for reference. Ensure the area is clean and dry to prevent any contamination or accidents during assembly. Follow the manual’s step-by-step instructions to connect all parts securely, ensuring proper alignment and functionality. Proper initial setup is crucial for safe and efficient operation.

2.2 Loading the Water Bottle

To load the water bottle, first, ensure the dispenser is turned off and unplugged for safety. Open the dispenser door or compartment located at the bottom. Remove any packaging or caps from the new water bottle. Carefully place the bottle into the compartment, aligning it with the probe or connector to ensure proper dispensing. Secure the bottle in place according to the manual’s instructions. Close the door and plug in the dispenser. Check for leaks by running a small amount of water through the system. Ensure the bottle is properly seated and the probe is correctly connected for optimal performance.

Operating the Dispenser

The Primo Bottom Load Water Dispenser operates seamlessly with touch-sensitive controls, offering hot, cold, and room-temperature water options. Ensure the bottle is properly loaded and connected.

3.1 Understanding the Dispenser Controls

The Primo Bottom Load Water Dispenser features intuitive, touch-sensitive controls for easy operation. The control panel includes buttons for dispensing hot, cold, and room-temperature water, along with a power button and lock functionality to prevent accidental activation. A green lock icon indicates when the unit is powered on and secured. Additional indicators provide feedback on water temperature settings and operational status. Proper usage of these controls ensures efficient and safe dispensing of water. Always refer to the manual for detailed instructions on customizing settings and troubleshooting common issues.

3.2 Dispensing Hot and Cold Water

Dispensing hot and cold water with the Primo Bottom Load Water Dispenser is straightforward. Ensure the unit is powered on and the water bottle is properly loaded. Select the desired temperature using the touch-sensitive controls. For hot water, press and hold the hot water button until the indicator lights up. Similarly, press the cold water button for chilled water. Place a cup or container under the spout and press the corresponding button to dispense. Allow a few seconds for the water to flow. Always ensure the dispenser is cleaned regularly and the water filter is replaced as recommended to maintain water quality.

Maintenance and Cleaning

Regular maintenance ensures optimal performance. Clean the dispenser with a damp cloth and mild detergent. Replace the water filter every 6 months or as needed for fresh water quality.

4.1 Cleaning the Dispenser

To maintain hygiene and performance, clean the dispenser regularly. Turn off the power and unplug it before cleaning. Wipe the exterior with a damp cloth and mild detergent. Use a soft brush to clean the water dispenser nozzle and drain. Avoid harsh chemicals or abrasive materials, as they may damage the surface. Dry all parts thoroughly after cleaning to prevent water spots. Regular cleaning helps prevent mineral buildup and ensures fresh-tasting water. Always refer to the manual for specific cleaning instructions tailored to your Primo Bottom Load Water Dispenser model.

4.2 Replacing the Water Filter

To ensure optimal water quality, replace the water filter regularly. Turn off the dispenser and unplug it for safety. Locate the filter, typically found at the bottom or rear. Remove the old filter by turning it counterclockwise and discard it. Install the new filter by aligning it properly and turning it clockwise until secure. Ensure the filter is installed vertically to reduce noise and potential waste. After replacement, flush the system by dispensing water for a few minutes to remove any impurities. Refer to the manual for specific recommendations on replacement intervals and compatible filters for your Primo Bottom Load Water Dispenser.

Safety Precautions

Always read the manual before use. Keep the dispenser out of children’s reach. Avoid misuse and ensure proper installation to prevent accidents. Regular maintenance is essential for safe operation.

5.1 Important Safety Information

  • Always read the manual thoroughly before assembling, installing, or operating the dispenser to ensure safe usage.
  • Keep the dispenser out of reach of children to avoid accidental injuries or damage.
  • Avoid misuse, such as dispensing anything other than water, to prevent malfunctions.
  • Ensure proper installation and maintenance to minimize risks of leaks or electrical issues.
  • Handle electrical components with care, and avoid touching hot water dispensing parts without protection.
  • Do not use unauthorized water bottles, as they may not fit properly or cause instability.
  • Keep the area around the dispenser clean and dry to prevent slips or electrical hazards.
  • Regularly inspect the dispenser for wear and tear, and address any issues promptly.
  • Follow all safety guidelines outlined in the manual to ensure optimal performance and user safety.

5.2 Avoiding Common Hazards

To ensure safe operation of the Primo Bottom Load Water Dispenser, avoid common hazards by following these guidelines:

  • Prevent overfilling of water bottles to avoid spills and leaks during loading.
  • Ensure the dispenser is placed on a stable, level surface to prevent tipping.
  • Keep electrical components dry and avoid touching them with wet hands.
  • Never tamper with internal mechanisms, as this can lead to electrical or mechanical failures.
  • Avoid using damaged or mismatched water bottles, as they may not fit securely.
  • Regularly clean up spills to prevent slipping hazards around the dispenser.
  • Inspect hoses and connections for wear and tear to avoid leaks or water damage.
  • Always unplug the dispenser before performing maintenance or repairs.

By adhering to these precautions, you can minimize risks and enjoy safe, reliable performance from your dispenser.

Troubleshooting Common Issues

Identify and resolve issues like dispenser not turning on, water not dispensing, or unusual noises by checking power supply, water bottle alignment, and resetting the unit if necessary;

6.1 Identifying and Solving Common Problems

Common issues with the Primo Bottom Load Water Dispenser include the unit not turning on, water not dispensing, or unusual noises. To address these, first ensure the dispenser is properly plugged in and the power switch is on. Check that the water bottle is correctly loaded and aligned. For no water flow, verify the probe is securely inserted into the bottle. Strange noises may indicate improper installation or blockages. Refer to the user manual for detailed troubleshooting steps or reset the dispenser by unplugging it for 30 seconds and plugging it back in. Always follow safety guidelines during troubleshooting.

6.2 Resetting the Dispenser

To reset the Primo Bottom Load Water Dispenser, unplug it from the power source for 30 seconds. This action will clear any temporary glitches and restore default settings. After plugging it back in, allow a few minutes for the system to restart. Resetting is ideal for resolving minor operational issues without affecting temperature settings. Always ensure the dispenser is empty of water before resetting to prevent spills. If issues persist, consult the user manual or contact customer support for further assistance.

Warranty and Customer Support

The Primo Bottom Load Water Dispenser comes with a limited warranty covering parts and labor for one year. For inquiries, visit www.PrimoWater.com or call customer support.

7.1 Understanding the Warranty

The Primo Bottom Load Water Dispenser is backed by a limited warranty, ensuring coverage for parts and labor under normal use for one year from purchase. This warranty protects against manufacturing defects and includes repair or replacement of faulty components. Regular maintenance, as outlined in the user manual, is required to maintain warranty validity. Damage caused by misuse, improper installation, or failure to follow guidelines is not covered. For detailed warranty terms and conditions, visit the Primo Water official website or contact their customer support team for assistance.

7.2 Contacting Customer Support

For any inquiries or assistance with your Primo Bottom Load Water Dispenser, contact Primo Water Customer Support through their official website or toll-free phone number. Visit www.primowater.com to access support resources, including user manuals, troubleshooting guides, and warranty information. You can also reach their team via email or phone for personalized help. Ensure to have your dispenser model number ready for efficient service. Primo Water is committed to providing timely and effective support to ensure optimal performance of your water dispenser.

The Primo Bottom Load Water Dispenser is a reliable and efficient solution for clean drinking water. Its bottom-loading design, temperature control, and durable construction make it a practical choice for homes and offices. By following the manual’s guidelines for installation, maintenance, and safety, users can ensure optimal performance and longevity. For any issues, Primo Water’s customer support is readily available. This dispenser offers a convenient and healthy hydration option, catering to various needs with its versatile features. Proper care and adherence to the manual will ensure years of trouble-free service.

a type of manual medicine

Manual medicine is a healthcare approach using hands-on techniques to diagnose and treat musculoskeletal and nervous system disorders, emphasizing non-invasive methods to restore function and alleviate pain.

1.1 Definition and Scope

Manual medicine refers to a non-invasive approach focusing on the diagnosis and treatment of musculoskeletal and nervous system disorders. It involves hands-on techniques, such as spinal manipulation, soft tissue mobilization, and joint mobilization, to restore optimal function and relieve pain. The scope encompasses various practices, including chiropractic care, osteopathic medicine, and physical therapy, aiming to address structural and functional imbalances. By targeting the interrelationship between the body’s systems, manual medicine promotes a holistic approach to health, often complementing other medical treatments to enhance overall well-being.

1.2 Historical Background

Manual medicine has roots in ancient healing practices, with evidence of spinal manipulation and soft tissue techniques dating back to early civilizations. The modern foundation was laid in the late 19th century, with Andrew Taylor Still pioneering osteopathy in 1874 and Daniel David Palmer establishing chiropractic care in 1895. These practices emphasized the body’s self-healing potential and the importance of manual interventions. Over time, manual medicine evolved, incorporating scientific advancements and becoming a recognized complementary therapy. Today, it is integrated into various healthcare systems worldwide, blending traditional techniques with contemporary medical knowledge to address a wide range of musculoskeletal and nervous system disorders.

1.3 Core Principles

Manual medicine is rooted in the belief that the body possesses inherent self-healing capabilities. It emphasizes the interconnection between the musculoskeletal system and overall health, focusing on restoring balance and optimal function. Key principles include the concept of self-regulation, where the body adapts to internal and external stresses, and the structure-function relationship, linking physical alignment to organ and system performance. Practitioners use hands-on techniques to identify and correct dysfunctions, such as restricted joints or soft tissue imbalances. The approach prioritizes non-invasive, patient-centered care, aiming to enhance mobility, reduce pain, and promote overall well-being through precise, targeted interventions.

Types of Manual Medicine

Manual medicine encompasses various therapeutic disciplines, including chiropractic care, osteopathic medicine, massage therapy, and physical therapy. Each focuses on non-invasive techniques to restore function and promote natural healing.

2.1 Chiropractic Care

Chiropractic care is a manual medicine discipline focusing on the diagnosis and treatment of mechanical disorders of the musculoskeletal system, particularly the spine. Practitioners use spinal manipulation and adjustments to restore joint mobility, reduce pain, and improve nervous system function. This non-invasive approach emphasizes the body’s natural healing capabilities. Techniques include high-velocity thrusts, soft tissue therapy, and ergonomic advice. Chiropractic care is widely recognized for addressing conditions like back pain, neck pain, and headaches, promoting overall well-being without the use of drugs or surgery.

2.2 Osteopathic Medicine

Osteopathic medicine is a holistic manual medicine approach focusing on the interconnectedness of the body’s systems. Founded by Andrew Taylor Still, it emphasizes preventive care and the body’s self-healing abilities. Osteopathic physicians use hands-on techniques, including osteopathic manipulative treatment (OMT), to diagnose and treat conditions, particularly musculoskeletal disorders. This method addresses structural imbalances and promotes overall well-being, often complementing conventional medical treatments.

2.3 Massage Therapy

Massage therapy is a widely recognized form of manual medicine that involves the manipulation of soft tissues to promote relaxation, relieve pain, and improve circulation. Techniques include Swedish massage, deep tissue, and sports massage, each tailored to specific needs. It is often used to address muscle tension, inflammation, and stress, enhancing overall well-being. By targeting connective tissues, massage therapy can improve joint mobility and reduce stiffness, making it a popular complementary treatment for chronic pain and rehabilitation. Its holistic approach supports the body’s natural healing processes, making it a versatile and effective option within the spectrum of manual medicine practices.

2.4 Physical Therapy (Manual Therapy)

Physical therapy, often referred to as manual therapy, is a cornerstone of manual medicine, focusing on the assessment and treatment of movement disorders. It employs hands-on techniques such as joint mobilization, soft tissue manipulation, and therapeutic exercises to restore function and mobility. Physical therapists use evidence-based practices to address injuries, chronic conditions, and post-surgical recovery, aiming to enhance strength, flexibility, and balance. By addressing the root causes of pain and dysfunction, manual therapy in physical therapy promotes long-term recovery and prevents future injuries, making it an essential component of comprehensive rehabilitation programs.

Techniques and Practices

Manual medicine employs various hands-on techniques such as soft tissue manipulation, joint mobilization, and myofascial release to enhance mobility and reduce pain effectively.

3.1 Soft Tissue Techniques

Soft tissue techniques focus on manipulating muscles, tendons, and ligaments to relieve tension, improve circulation, and restore flexibility. These methods include massage, trigger point therapy, and fascial release, enhancing healing and reducing discomfort.

3.2 Joint Mobilization

Joint mobilization involves the application of manual forces to improve joint mobility and reduce stiffness. Techniques include graded oscillations, distractions, and glides, tailored to the specific joint and condition. This method enhances synovial fluid circulation, breaks adhesions, and restores normal movement patterns. Practitioners use gentle to firm pressures, depending on the grade of mobilization, to address restrictions in joint play. Joint mobilization is widely used in osteopathic medicine, chiropractic care, and physical therapy to address conditions like arthritis, sports injuries, and chronic pain, promoting functional recovery and improving overall joint health.

3.3 Myofascial Release

Myofascial release (MFR) is a manual therapy technique targeting the fascia, a connective tissue surrounding muscles, nerves, and organs. It involves gentle, sustained pressure to eliminate pain and restore motion by addressing fascial restrictions. MFR is widely used to treat chronic pain, fibromyalgia, and sports injuries. Practitioners apply slow, deep strokes or holds to release fascial tension, improving circulation and reducing inflammation. This technique is integral to osteopathic medicine, physical therapy, and massage therapy, promoting relaxation, flexibility, and overall musculoskeletal health. Its non-invasive nature makes it a popular choice for patients seeking holistic pain relief and enhanced mobility.

Benefits and Effectiveness

Manual medicine offers enhanced well-being through improved mobility, pain reduction, and a non-invasive approach, addressing musculoskeletal issues while promoting overall health and vitality naturally.

4.1 Pain Relief

Manual medicine excels in providing pain relief through targeted techniques like joint mobilization and soft tissue manipulation, which reduce inflammation and restore normal movement, offering lasting comfort.

4.2 Improved Mobility

Manual medicine enhances mobility by addressing joint and soft tissue restrictions, improving range of motion, and reducing stiffness. Techniques like joint mobilization and soft tissue work promote fluid movement, enabling patients to perform daily activities with greater ease and flexibility. This approach not only alleviates physical limitations but also empowers individuals to maintain an active lifestyle, fostering overall well-being.

4.3 Holistic Approach

Manual medicine adopts a holistic approach, considering the interconnectedness of the body’s systems. By addressing the musculoskeletal system, it influences nervous system function, circulation, and overall well-being. This approach treats the whole person, not just symptoms, promoting self-healing and long-term health. Techniques aim to restore balance, enhancing the body’s natural healing processes and improving quality of life through non-invasive, patient-centered care.

Risks and Contraindications

Manual medicine carries risks like temporary discomfort or rare complications, such as fractures in fragile bones. Certain conditions, including osteoporosis or acute injuries, may require caution or avoidance.

5.1 Potential Risks

Manual medicine, while generally safe, carries potential risks. Temporary discomfort, soreness, or stiffness may occur after treatment. Rare but serious complications, such as fractures or nerve damage, can arise in vulnerable individuals, like those with osteoporosis or acute injuries. Proper training and technique are critical to minimizing risks. Patients with certain conditions, such as recent fractures or severe osteoporosis, may need cautious or alternative approaches. Open communication between practitioner and patient is essential to assess suitability and ensure safe practice. Adverse effects are uncommon but highlight the importance of skilled, licensed professionals and thorough patient evaluation.

5.2 Conditions to Avoid

Certain conditions necessitate caution or avoidance in manual medicine. Osteoporosis, recent fractures, or severe joint instability require careful consideration. Conditions like rheumatoid arthritis, herniated discs, or spinal cord compression may contraindicate specific techniques. Active infections, acute injuries, or cancerous lesions should be approached with caution. Patients with blood clotting disorders or taking anticoagulants are at higher risk of complications. Additionally, manual therapy should be avoided in areas with recent surgeries or implants. A thorough medical history and imaging studies are essential to ensure safe and effective treatment, preventing potential harm and optimizing therapeutic outcomes for patients with these conditions.

Training and Certification

Manual medicine practitioners undergo rigorous training, earning degrees like DO or DC, with specialized programs and certifications ensuring expertise in hands-on therapies and patient care.

6.1 Educational Requirements

Pursuing a career in manual medicine typically requires a doctoral degree, such as a Doctor of Osteopathic Medicine (DO) or Doctor of Chiropractic (DC). These programs involve extensive classroom and clinical training, focusing on anatomy, physiology, and hands-on therapeutic techniques. Undergraduate prerequisites often include courses in biology, chemistry, and physics. Admission to these programs is competitive, requiring strong academic performance and a demonstrated commitment to patient care. The educational journey ensures practitioners are well-prepared to diagnose and treat musculoskeletal and nervous system disorders effectively.

6.2 Licensing and Accreditation

Licensing and accreditation are critical for practitioners of manual medicine to ensure competency and adherence to standards. In the U.S., chiropractors must pass the National Board of Chiropractic Examiners (NBCE) exam and obtain state licenses. Osteopathic physicians (DOs) must pass the Comprehensive Osteopathic Medical Licensing Examination (COMLEX) series and meet state medical board requirements. Accreditation for educational programs is overseen by bodies like the Commission on Osteopathic College Accreditation (COCA) for osteopathic schools and the Council on Chiropractic Education (CCE) for chiropractic programs. These processes guarantee that practitioners are qualified to safely and effectively administer manual medicine techniques.

pdf the secret life of bees

Sue Monk Kidd’s beloved novel, set in 1964 South Carolina, introduces Lily Owens, a young girl haunted by her mother’s death and seeking refuge with the enigmatic Boatwright sisters, exploring themes of racial tension, forgiveness, and the transformative power of female bonds, all intertwined with the symbolic world of bees.

1.1 Overview of the Novel

The Secret Life of Bees by Sue Monk Kidd is a poignant coming-of-age story set in 1964 South Carolina. The novel follows 14-year-old Lily Owens, who flees her abusive father, T-Ray, after her stand-in mother, Rosaleen, is threatened by racial violence. Seeking refuge in Tiburon, Lily discovers the Boatwright sisters—August, May, and June—who are beekeepers and harbor secrets about her mother’s past. The novel explores themes of motherhood, loss, forgiveness, and racial tensions, weaving a tale of healing and self-discovery through Lily’s journey and her connection to the mystical world of bees and the Black Madonna.

1.2 Historical Context of 1964 South Carolina

The novel is set against the backdrop of 1964 South Carolina, a time of significant racial tension and social change. The Civil Rights Act had just been passed, yet segregation and discrimination persisted, fueling animosity between Black and white communities. This volatile environment shapes the characters’ experiences, particularly Rosaleen, a Black woman whose defiance of racist norms sparks conflict. The historical context underscores themes of inequality, resistance, and the struggle for justice, providing a vivid backdrop for Lily’s journey of self-discovery and healing amidst societal upheaval.

The Plot Summary

Lily Owens escapes her abusive father with Rosaleen, her stand-in mother, fleeing to Tiburon, where they find refuge with the beekeeping Boatwright sisters, uncovering secrets about her mother’s past and racial tensions in 1964 South Carolina.

2.1 Lily Owens’ Journey and Her Mother’s Death

Lily Owens’ life is defined by the haunting memory of her mother’s death, which she believes she caused at age four. Growing up with an abusive father, T-Ray, and her stand-in mother, Rosaleen, Lily struggles with guilt and a longing for maternal love. Her journey begins with a blurred recollection of the tragic event, fueling her quest for forgiveness and understanding. The mysterious circumstances surrounding her mother’s death drive Lily’s search for truth and healing, setting the stage for her transformative adventure.

2.2 Escape to Tiburon and the Boatwright Sisters

Lily and Rosaleen flee to Tiburon, a town connected to her mother’s past, seeking refuge from racial tensions and her abusive father. They find solace with the Boatwright sisters—August, May, and June—who are beekeepers living in a world of honey and bees. The sisters, each with distinct personalities, welcome Lily into their home, introducing her to their unique way of life. Tiburon holds secrets about her mother, and through the sisters’ wisdom and kindness, Lily begins to heal and uncover truths about her family’s history, finding a sense of belonging and purpose.

Themes in “The Secret Life of Bees”

The novel explores themes of motherhood, loss, forgiveness, and racial tensions, highlighting the divine power of women and the healing power of love and community.

3.1 Motherhood, Loss, and Forgiveness

Motherhood, loss, and forgiveness are central themes in The Secret Life of Bees. Lily Owens’ journey is driven by her guilt over her mother’s death and her longing for maternal love. The novel portrays motherhood not just as a biological bond but as a nurturing force that can transcend race and circumstance. Through her relationships with Rosaleen and the Boatwright sisters, Lily learns to confront her past, seek forgiveness, and ultimately find a sense of belonging and healing. These themes resonate deeply, offering a powerful exploration of human resilience and the transformative power of love.

3.2 Racial Tensions and Social Justice

Set against the backdrop of 1964 South Carolina, The Secret Life of Bees explores the profound racial tensions of the era. Rosaleen’s defiance of the town’s racists sparks Lily’s journey, highlighting the deep-seated prejudices and injustices faced by Black communities. The novel delves into the Civil Rights Movement, showcasing the courage of characters like Rosaleen, who risk everything for equality. Through the Boatwright sisters, Kidd portrays the resilience and solidarity of Black women, offering a powerful critique of systemic racism while celebrating the strength and unity of marginalized voices in the face of oppression.

The Symbolism of Bees

Bees symbolize community, resilience, and divine femininity, reflecting the interconnected lives of the Boatwright sisters and their spiritual practices, embodying life’s beauty and collective strength.

4.1 Bees as a Metaphor for Life and Community

The bees in The Secret Life of Bees serve as a powerful metaphor for life and community. They represent the hive’s collective harmony, resilience, and unity. Like the bees, the Boatwright sisters work together, each contributing their unique skills, creating a thriving ecosystem. The hive mirrors human society, emphasizing cooperation and the importance of each individual’s role. Bees also symbolize transformation, as they turn nectar into honey, reflecting Lily’s journey from pain to healing. This imagery underscores themes of interconnectedness and the strength found in community, central to the novel’s message.

Characters and Their Roles

Lily Owens, the protagonist, seeks healing and identity. Rosaleen, her stand-in mother, embodies courage and loyalty. The Boatwright sisters—August, May, and June—offer wisdom, kindness, and resilience, shaping Lily’s journey.

5.1 Lily Owens: The Protagonist’s Growth

Lily Owens, a vulnerable yet resilient 14-year-old, embarks on a journey of self-discovery and healing. Haunted by guilt over her mother’s death and her strained relationship with her abusive father, T-Ray, Lily finds solace in the love and wisdom of Rosaleen and the Boatwright sisters. Through her experiences, she learns to confront her past, embrace her identity, and understand the power of forgiveness. Her growth is marked by a shift from insecurity to self-acceptance, as she discovers the strength of female bonds and the transformative power of love and community.

5.2 Rosaleen: The Stand-In Mother Figure

Rosaleen, a fiercely protective and wise Black woman, serves as a stand-in mother to Lily, offering comfort and strength in the absence of her biological mother. Her bold defiance and unwavering loyalty prompt their escape to Tiburon, sparking Lily’s journey of discovery. Rosaleen’s maternal instincts and resilience in the face of racial hostility provide Lily with a sense of belonging and guidance, shaping her understanding of love, courage, and identity. Through Rosaleen, Lily experiences the nurturing and support she desperately craves, highlighting the profound impact of female caregivers in her life.

5.3 The Boatwright Sisters: August, May, and June

The Boatwright sisters—August, May, and June—are three Black beekeepers who take Lily under their wing in Tiburon. August, the eldest, embodies wisdom and compassion, guiding Lily toward healing. May, gentle and emotionally vulnerable, finds solace in her “wailing wall,” while June, guarded yet kind, gradually warms to Lily. Together, they teach Lily the art of beekeeping and introduce her to the Black Madonna, symbolizing female power and spirituality. Their home becomes a sanctuary for Lily, offering love, acceptance, and a sense of belonging she has long craved.

The Author: Sue Monk Kidd

Sue Monk Kidd is an American author known for her lyrical prose and exploration of racial tensions and feminist themes, with a background in non-fiction, nursing, and journalism.

6.1 Background and Writing Style

Sue Monk Kidd, born in Southern Georgia, began her writing career in non-fiction, exploring themes of spirituality and personal growth. Her background as a nurse influenced her empathetic storytelling. Transitioning to fiction, Kidd’s lyrical prose captivates readers with vivid imagery and emotional depth. Her writing often explores racial tensions, gender roles, and personal transformation, creating immersive narratives. The Secret Life of Bees showcases her ability to weave historical context with intimate character development, blending poetic language with a compelling plot. Kidd’s unique voice resonates with readers, making her a celebrated author in contemporary literature.

Cultural and Literary Significance

The Secret Life of Bees has become a cultural phenomenon, sparking discussions on race, gender, and forgiveness. Its exploration of human relationships and resilience resonates deeply, making it a timeless literary treasure that continues to inspire readers and fuel important conversations about identity and healing.

7.1 Impact on Readers and Literary Discussions

The Secret Life of Bees has deeply resonated with readers, offering a poignant exploration of loss, forgiveness, and racial tensions. Its vivid storytelling and relatable characters, particularly Lily’s journey, have fostered emotional connections and reflections on identity. The novel has sparked meaningful discussions in book clubs and academic circles, praised for its ability to address complex social issues with sensitivity and grace; Its themes of female empowerment and healing continue to inspire, solidifying its place as a modern literary classic that encourages empathy and understanding across generations.

The Secret Life of Bees leaves a lasting impact, offering a timeless story of empowerment, healing, and the unbreakable bonds of female relationships, resonating deeply with readers universally.

8.1 The Legacy of “The Secret Life of Bees”

Sue Monk Kidd’s The Secret Life of Bees has left an indelible mark on contemporary literature, celebrated for its poignant exploration of racial justice, female resilience, and the power of forgiveness. The novel’s vivid storytelling and rich symbolism have captivated readers worldwide, earning it critical acclaim and a place on bestseller lists. Adapted into a film and a musical, its legacy extends beyond the page, inspiring conversations about identity, community, and the transformative power of love. Its enduring popularity underscores its relevance as a timeless tale of healing and empowerment.

magegee keyboard manual

Welcome to the official MageGee Keyboard Manual! This guide provides detailed insights into features, setup, and customization options, helping you maximize your gaming and typing experience with premium mechanical keyboards designed for performance and style.

1.1 Overview of the MageGee Keyboard Features

MageGee keyboards are premium mechanical gaming peripherals offering exceptional performance and style. They feature customizable RGB LED backlighting, durable switch types, and programmable keys for personalized gaming experiences. Designed with a compact 60% layout, these keyboards provide a portable and efficient typing solution. With plug-and-play functionality and compatibility across multiple operating systems, MageGee keyboards deliver high-quality craftsmanship and aesthetic appeal for gamers and typists alike.

1.2 Importance of the User Manual for Optimal Usage

The user manual is essential for unlocking the full potential of your MageGee keyboard. It provides detailed instructions for setup, customization, and troubleshooting, ensuring a seamless experience. By understanding the manual, users can optimize keyboard performance, customize RGB lighting, and resolve common issues efficiently. It also serves as a guide for warranty information and accessing customer support, making it a vital resource for both new and experienced users.

Installation and Setup Guide

This guide walks you through unboxing, connecting your MageGee keyboard, and installing necessary drivers for a seamless setup experience to ensure optimal performance and functionality.

2.1 Unboxing and Initial Setup

Upon unboxing your MageGee keyboard, you’ll find the keyboard itself, a detachable USB-C cable, key puller, and user manual. The keyboard is meticulously packaged to ensure safety during transit. Begin by inspecting all components for damage and ensuring all items are included. Gently remove the protective covering from the keyboard and cable. Plug in the USB-C cable to your device, and the keyboard should automatically recognize and connect, ready for immediate use. The manual provides detailed steps for initial setup and customization options, ensuring a smooth start to your gaming or typing experience.

2.2 Connecting the Keyboard to Your Device

Connecting your MageGee keyboard is straightforward. Use the provided USB-C cable to plug it into your computer or gaming setup. The keyboard supports plug-and-play functionality, ensuring immediate recognition by most operating systems. For wireless models, refer to the manual for pairing instructions. Once connected, your device will automatically detect the keyboard, allowing you to start typing or gaming right away. Ensure the USB port is functional and the cable is securely connected for optimal performance.

2.3 Driver Installation and Software Setup

Install the necessary drivers from the official MageGee website to enhance your keyboard’s functionality. Download and run the software, following on-screen instructions for installation. Once installed, the program allows customization of RGB backlighting, macro keys, and keybinds. Ensure your device recognizes the keyboard before proceeding. Refer to the manual for troubleshooting if issues arise during the setup process.

Key Functions and Shortcuts

Explore the keyboard’s key functions and shortcuts, including multimedia controls, function keys, and customizable shortcuts. These features enhance productivity and gaming efficiency, ensuring seamless control.

3.1 Understanding the Keyboard Layout

The MageGee keyboard features a compact 60% layout, designed for portability and efficiency. It includes standard keys, function keys, and media controls. The RGB backlighting enhances visibility, while customizable keys allow personalization. Function keys (FN) enable shortcuts for brightness, media playback, and more. The layout balances productivity and gaming needs, offering intuitive navigation and ergonomic design for extended use; Familiarize yourself with key positions to optimize your typing and gaming experience.

3.2 Multimedia and Function Key Controls

Multimedia and function keys on MageGee keyboards simplify control over media playback and system settings. The FN key combines with top-row keys to adjust brightness, volume, and playback. Dedicated media keys provide quick access to play, pause, and skip functions. These controls enhance multitasking and streamline your workflow, ensuring seamless integration with both gaming and productivity tasks. Customize these shortcuts to suit your preferences for optimal efficiency.

3.3 Customizable Keys and Macro Programming

MageGee keyboards offer customizable keys and macro programming for enhanced productivity. Using the FN key or dedicated software, you can assign complex commands to individual keys. Create custom macros for gaming or workflows, and store multiple profiles for different applications. This feature allows personalized control, enabling you to streamline tasks and dominate in games with precision and efficiency;

Customization Options

Explore extensive customization options, including RGB backlighting, switch types, and personalized keybinds. Tailor your keyboard to suit your preferences for both aesthetics and functionality with ease.

4.1 Adjusting RGB LED Backlighting

The MageGee keyboard offers vibrant RGB LED backlighting with multiple color options and effects. Users can adjust brightness, select from predefined modes, or create custom lighting profiles. The function keys allow quick access to these settings, ensuring a personalized and immersive experience. This feature enhances both aesthetics and usability, making it a standout aspect of the keyboard’s design.

4.2 Switch Types and Their Characteristics

MageGee keyboards feature high-quality mechanical switches, including linear, tactile, and clicky types. Linear switches offer smooth actuation, while tactile switches provide a noticeable bump. Clicky switches combine tactile feedback with audible sound. Each switch type caters to different preferences, ensuring optimal performance for gaming, typing, or professional use. Popular options like blue switches deliver precise tactile feedback, making them ideal for both productivity and gaming environments.

4.3 Personalizing Keybinds for Gaming

MageGee keyboards allow seamless customization of keybinds to suit your gaming needs; Users can assign complex macros, remap keys, and create custom profiles for different games. The intuitive software enables easy setup of advanced functions, ensuring optimal performance. Whether it’s assigning spells in MMOs or optimizing controls for FPS games, personalizing keybinds enhances precision and speed, giving you a competitive edge in any gaming scenario.

Troubleshooting Common Issues

This section helps resolve frequent problems like connectivity issues, unresponsive keys, and LED malfunctions. Follow step-by-step solutions to ensure smooth operation and optimal performance of your MageGee keyboard.

5.1 Resolving Connectivity Problems

To address connection issues, ensure the USB cable is securely connected and try a different port. For wireless models, check battery levels and Bluetooth pairing. Restart your device and keyboard to refresh the connection. If issues persist, reinstall drivers from the official MageGee website or reset the keyboard to factory settings for optimal performance.

5.2 Fixing Unresponsive Keys

If certain keys are unresponsive, first clean them to remove dust or debris. Ensure the keyboard is properly connected and try pressing keys firmly. Use the MageGee software to test key functionality. If issues persist, reset the keyboard to factory settings or update the firmware. For mechanical switches, consider replacing the switch or contacting support for assistance.

5.3 Addressing LED Backlight Malfunctions

If your LED backlight is malfunctioning, check the RGB settings in the MageGee software. Ensure the backlight toggle is enabled and brightness is adjusted. Restart the keyboard or unplug and replug it. Clean debris around keys and inspect for loose connections. If issues persist, update the firmware or reset to factory settings. Contact customer support if the problem remains unresolved.

Warranty and Support Information

MageGee keyboards come with a limited warranty covering manufacturing defects. For support, contact customer service via email or phone. Visit the official website for detailed warranty terms and troubleshooting guides.

6.1 Understanding the Warranty Policy

MageGee keyboards are backed by a limited warranty covering manufacturing defects for a specified period. The warranty typically includes repair or replacement of defective components. To claim warranty benefits, registration is required within 30 days of purchase. Exclusions apply for damage caused by misuse or improper maintenance. For full details, refer to the official warranty document provided with your keyboard or available on the MageGee website.

6.2 Contacting MageGee Customer Support

For assistance, contact MageGee support via email at support@magegee.com or call their hotline at +86 755 28707737. Visit their official website for live chat options and comprehensive support resources. The team is available to address inquiries, troubleshooting, and warranty-related issues. Online forums and community platforms also offer additional help and tips from experienced users.

6.3 Online Resources and Community Help

Visit supportmagegee.com for official guides, FAQs, and troubleshooting resources. Explore community forums and social media groups for tips and advice from experienced users. The MageGee website also offers detailed product manuals and driver downloads. Engage with the gaming community to share setups and learn from experts, ensuring you get the most out of your keyboard. Online resources provide 24/7 assistance and insights.

Advantages of Choosing MageGee Keyboards

MageGee keyboards offer premium build quality, durability, and aesthetic design with customizable RGB backlighting. They deliver enhanced gaming performance and a personalized typing experience, making them a top choice for gamers and enthusiasts.

7.1 Premium Build Quality and Durability

MageGee keyboards are crafted with high-quality materials, ensuring exceptional durability and a premium feel. Featuring metal frames and double-shot keycaps, they withstand rigorous use while maintaining a sleek, professional appearance. The robust construction ensures long-lasting performance, making them ideal for both gaming and everyday typing. Durable switches and a solid build provide a satisfying typing experience, reflecting MageGee’s commitment to excellence and reliability.

7.2 Enhanced Gaming Performance

MageGee keyboards deliver exceptional gaming performance with responsive mechanical switches, customizable RGB backlighting, and macro programming. Featuring N-key rollover and 100% anti-ghosting, they ensure accurate keystrokes during intense gaming sessions. The premium build quality and ergonomic design provide long-lasting comfort, while customizable keybinds allow gamers to tailor their setup for optimal performance in competitive environments. Enhanced durability and rapid actuation make MageGee keyboards a top choice for serious gamers seeking precision and reliability.

7.3 Aesthetic Design and RGB Customization

MageGee keyboards feature stunning RGB backlighting with customizable lighting effects, creating a visually striking experience. The sleek, compact designs blend seamlessly into any gaming setup. With adjustable brightness and color options, users can personalize their keyboard’s aesthetic to match their unique style. Additionally, customizable keybinds and macro functions enhance functionality, making MageGee keyboards a perfect blend of style, performance, and personalization for gamers and typists alike.

Optimal Usage in Gaming Setups

MageGee keyboards enhance gaming setups with their mechanical switches, customizable RGB lighting, and macro capabilities, providing both performance and aesthetic appeal for immersive gaming sessions.

8.1 Integrating with Other Gaming Accessories

MageGee keyboards seamlessly integrate with gaming mice, headsets, and monitors, enhancing your setup’s aesthetic and functionality. Their customizable RGB lighting and macro capabilities sync perfectly with other accessories, creating a cohesive gaming environment. Compatibility with popular gaming software ensures synchronized effects, while the keyboard’s compact design allows easy placement alongside other peripherals for an optimized and immersive gaming experience.

8.2 Configuring the Keyboard for Different Games

MageGee keyboards offer customizable keybinds and macro programming, allowing you to tailor the layout for specific games. For FPS games, assign macros to keys for rapid commands, while MMOs benefit from custom key clusters. The manual guides you through setting up macros and optimizing key assignments, ensuring peak performance across various gaming genres. Personalize your setup to dominate in every game with intuitive and adaptable controls.

8.3 Maximizing Ergonomics for Long Gaming Sessions

MageGee keyboards are designed with ergonomics in mind, ensuring comfort during extended gaming sessions. Adjust the keyboard’s height settings and utilize the detachable wrist rest for optimal hand positioning. The mechanical switches provide tactile feedback, reducing finger fatigue. Maintain proper posture and take regular breaks to prevent strain. Customize keybinds to minimize finger movement, enhancing both comfort and performance during long gaming marathons.

brown bear book pdf

This beloved children’s classic, written by Bill Martin Jr. and illustrated by Eric Carle, features repetitive text and vibrant animals, making it a timeless educational tool for young readers and educators alike.

Overview of the Book and Its Significance

Brown Bear, Brown Bear, What Do You See? is a timeless children’s book authored by Bill Martin Jr. and illustrated by Eric Carle. First published in 1967, it has become a beloved classic worldwide. The story features a repetitive, rhythmic structure that engages young readers, introducing them to colorful animals and their unique characteristics. Its simplicity and predictability make it ideal for early learners, fostering language development and a love for reading. The book’s vibrant illustrations and sing-song text create unforgettable imagery, capturing children’s imaginations. Widely used in classrooms and homes, it is celebrated for its educational value, teaching colors, animals, and narrative skills. Its enduring popularity has made it a staple in children’s literature, with millions of copies sold and translations into multiple languages. The brown bear book PDF version is also available, offering convenient access to this cherished tale.

Structure and Content of the Book

The book follows a simple, repetitive structure, making it engaging for young readers. Each page introduces a new animal, such as a red bird, yellow duck, or blue horse, with the recurring question, “What do you see?” This rhythmic pattern encourages children to anticipate and participate in the narrative. The story ends with a teacher seeing a group of children, tying the sequence together. The text is accompanied by Eric Carle’s iconic collage illustrations, which bring the animals to life with bold colors and textures. The brown bear book PDF maintains this structure, offering a digital format that preserves the original’s charm. Its predictable format and vibrant visuals make it a favorite for reading aloud and early learning.

Authors and Their Contributions

Bill Martin Jr. and Eric Carle collaborated to create this beloved classic. Martin’s rhythmic prose and Carle’s vibrant collages make the brown bear book PDF a timeless educational treasure.

Bill Martin Jr.: Biography and Literary Impact

Bill Martin Jr. was a renowned author and educator, best known for his rhythmic and engaging children’s books. Despite struggling with reading as a child, he earned a doctorate in education and became a leading figure in literacy development. His collaboration with Eric Carle on Brown Bear, Brown Bear, What Do You See? showcased his ability to craft simple, repetitive text that captivates young readers. This PDF version of the book has become a staple in classrooms, helping children develop narrative and language skills. Martin’s work emphasizes the importance of early literacy and has left a lasting impact on educational publishing.

Eric Carle: His Artistic Style and Collaboration

Eric Carle is celebrated for his distinctive collage-based illustrations, which bring vibrant colors and textures to life. His work in Brown Bear, Brown Bear, What Do You See? combines flat, boldly colored shapes to create unforgettable animal characters. Carle’s artistic style seamlessly complements Bill Martin Jr.’s rhythmic text, making the book a visual and auditory delight. Their collaboration marked a milestone in children’s literature, blending art and education. The PDF version of the book preserves Carle’s iconic imagery, ensuring his work remains accessible to new generations. His contributions have made the story a timeless tool for teaching colors, animals, and narrative skills, while inspiring a love for reading and art in young learners.

Literary Style and Educational Value

Brown Bear, Brown Bear, What Do You See? features repetitive text and rhythmic patterns, enhancing phonological awareness and early reading skills. Its colorful animal parade introduces children to colors, animals, and narrative skills, making it a valuable educational tool for young learners.

Repetition and Rhythm in the Text

The book’s engaging structure relies heavily on repetition and rhythm, making it a captivating read-aloud experience. Each page follows a predictable pattern, with the titular question, “Brown Bear, Brown Bear, what do you see?” repeated throughout. This repetition aids in memorization and language development for young readers. Bill Martin Jr.’s rhythmic text, combined with rhyming words, creates a sing-song cadence that appeals to children’s natural love for musicality in language. The repetition also encourages audience participation, as children can anticipate and join in on the familiar phrases. This rhythmic style not only enhances the story’s appeal but also supports early literacy skills, making it a beloved choice for both parents and educators.

Use of Colors and Animals in the Story

The story seamlessly integrates a variety of colorful animals, such as a red bird, yellow duck, and blue horse, to captivate young readers. Each animal is paired with a distinct color, helping children recognize and remember both the creature and its hue. The vibrant illustrations by Eric Carle, created using his signature collage technique, bring these animals to life, making the learning experience both visual and engaging. The repetition of colors and animals reinforces their association, aiding in memory retention. This imaginative use of color and wildlife not only entertains but also educates, making it a powerful tool for teaching children about the natural world and its diversity.

Educational Benefits and Classroom Use

The book enhances narrative skills, encouraging language development through repetition and colorful visuals, making learning interactive and fostering engagement in educational settings for young learners.

Teaching Children About Narrative Skills

Brown Bear, Brown Bear, What Do You See? is a powerful tool for teaching narrative skills to young children. The repetitive structure and rhythmic text introduce sequencing, prediction, and cause-and-effect relationships. Children learn to identify and name animals, colors, and actions, fostering vocabulary development. The story’s simplicity encourages children to retell the narrative in their own words, enhancing their ability to understand and create stories. Teachers often use sequencing activities, such as ordering animal cards, to reinforce comprehension. The book’s engaging format also promotes active participation, with children predicting the next animal, thus building foundational literacy and narrative skills in a fun and interactive way. This makes it an excellent resource for early childhood education and language development.

Activities and Resources for Parents and Teachers

Parents and teachers can enhance learning with engaging activities inspired by Brown Bear, Brown Bear, What Do You See?. Create a coloring book featuring the story’s animals, allowing children to explore colors and creativity. Develop animal masks for role-playing, encouraging storytelling and imaginative dialogue. Educators can design sequencing games using animal cards to improve memory and narrative skills. Additionally, printable rhyming worksheets can reinforce phonological awareness. For classroom use, teachers can create a collaborative “Classroom Zoo” book, where students draw and write about their favorite animals. These resources foster interactive learning, making the book a versatile tool for both home and school environments. They also provide opportunities for children to practice language, creativity, and collaboration in a fun and engaging way.

Availability and Additional Resources

The Brown Bear, Brown Bear, What Do You See? PDF is widely available for download on platforms like z-lib.org. Explore related books by Bill Martin Jr. and Eric Carle for extended learning.

Downloading the PDF Version

The Brown Bear, Brown Bear, What Do You See? PDF is easily accessible online, offering a convenient way to enjoy this classic tale. Platforms like z-lib.org provide free downloads, allowing parents and educators to share the story with children effortlessly. The PDF format ensures vibrant illustrations and clear text, preserving the book’s educational value. Once downloaded, the file can be accessed on various devices, making it ideal for classroom use or home reading. This digital version maintains the repetition and rhythm that make the book engaging, while also introducing children to colors and animals in an interactive way. Downloading the PDF is a simple process, ensuring that this beloved story remains accessible to new generations of young learners.

Related Books and Extensions for Learning

For fans of Brown Bear, Brown Bear, What Do You See?, several related books and resources are available to extend learning. Polar Bear, Polar Bear, What Do You See? and Baby Bear, Baby Bear, What Do You See? offer similar rhythmic storytelling and colorful animals. Additionally, Bill Martin Jr. and Eric Carle collaborated on other educational titles, such as Rainbow Bear, which explores colors and imagination. Teachers and parents can also find teaching resources, including sequencing games, coloring activities, and lesson plans, to reinforce narrative skills and color recognition. These extensions provide a comprehensive learning experience, making the Brown Bear series a valuable tool for early childhood education and creative exploration.

non verbal reasoning 11+ pdf

Non-Verbal Reasoning 11+ PDFs are essential resources for mastering spatial awareness, shape sequences, and logical problem-solving. These guides provide practice papers and answers to prepare effectively for exams.

Overview of Non-Verbal Reasoning Tests

Non-Verbal Reasoning tests assess logical reasoning, spatial awareness, and problem-solving skills through visual questions. These tests typically involve shape sequences, pattern completion, and identifying relationships between objects. Questions are often presented in multiple-choice formats, requiring candidates to analyze and deduce the correct answer. The tests are timed, with a set number of questions to be completed within a specific duration. They are designed to evaluate cognitive abilities independent of language skills, making them fair for all candidates. Practice papers and PDF resources are widely available, offering realistic exam scenarios to help candidates familiarize themselves with the question styles and improve their performance.

Importance of Practicing with PDF Resources

Practicing with Non-Verbal Reasoning PDF resources is crucial for building familiarity and confidence. These resources provide realistic exam questions, allowing candidates to understand the structure and timing of the tests. PDFs often include answer keys, enabling self-assessment and identifying areas for improvement. Regular practice helps develop problem-solving strategies and reduces exam anxiety. Parents and students can access these materials easily, making them a convenient tool for preparation. Utilizing PDFs ensures that candidates are well-prepared for the challenges of Non-Verbal Reasoning tests, enhancing their chances of success in competitive exams. Consistent practice with these resources is key to achieving optimal results.

Types of Non-Verbal Reasoning Questions

Non-Verbal Reasoning tests include shape sequences, spatial awareness, and pattern recognition. These questions assess logical thinking and visual problem-solving skills, often requiring identification of the next shape or transformation.

Completing Shapes and Patterns

Completing shapes and patterns is a fundamental type of Non-Verbal Reasoning question. These questions require identifying the next shape or filling in missing elements to maintain a logical sequence or design. Often, patterns involve rotations, reflections, or size changes. Practice papers in PDF format provide numerous examples, helping students recognize rules and relationships between shapes. This skill assesses logical thinking and visual problem-solving abilities. Regular practice with sample papers enhances speed and accuracy, crucial for exam success. Mastering these questions builds confidence and improves spatial awareness, essential for tackling more complex Non-Verbal Reasoning challenges effectively.

Identifying the Next Shape in a Sequence

Identifying the next shape in a sequence is a critical aspect of Non-Verbal Reasoning tests. These questions present a series of shapes with a hidden pattern, requiring students to deduce the logical progression. Patterns can involve transformations like rotations, reflections, or size changes. PDF practice papers offer numerous examples, helping students recognize these rules. This skill evaluates analytical thinking and the ability to predict outcomes. Regular practice enhances problem-solving speed and accuracy, essential for exam success. Mastering sequence questions builds logical reasoning and visual processing skills, which are vital for excelling in Non-Verbal Reasoning sections of the 11+ exam.

Understanding Spatial Awareness Questions

Spatial awareness questions test a student’s ability to visualize and manipulate shapes mentally. These questions often involve identifying how shapes can be rotated, flipped, or combined to fit a specific arrangement. For example, a shape might need to be mirrored or rotated to match a given design. Practice PDFs provide numerous examples, such as determining which shape completes a larger figure or identifying a shape’s orientation after transformation. These questions enhance visual reasoning and problem-solving skills, crucial for Non-Verbal Reasoning success. Regular practice helps students develop quick and accurate spatial reasoning, a key skill for 11+ exams.

Free 11+ Non-Verbal Reasoning Practice Papers

These PDF resources offer a variety of questions, including shape sequences and spatial awareness tasks, to help students prepare effectively for the 11+ exam.

Best Sources for Free PDF Downloads

The best sources for free Non-Verbal Reasoning 11+ PDF downloads include Bond 11+, 11 Plus Guide, and Exam-Papers.com. These platforms offer a wide range of practice papers, covering shape sequences, spatial awareness, and logic puzzles. Many resources include answer sheets, enabling students to track their progress. They are ideal for familiarising children with the exam format and improving problem-solving skills. Additionally, these PDFs are updated regularly to match the latest exam patterns for both CEM and GL assessment formats. Parents and tutors can download these materials to provide targeted practice, ensuring students are well-prepared for the 11+ entrance exams.

How to Use Sample Papers Effectively

To maximize the benefits of Non-Verbal Reasoning 11+ PDFs, use sample papers strategically. Start by setting a timer to simulate exam conditions, helping your child practice time management. Encourage them to attempt all questions, focusing on understanding patterns and spatial relationships. After completing a paper, review the answers to identify strengths and weaknesses. Use the feedback to target specific areas needing improvement. Regularly track progress to monitor growth and adjust study plans accordingly. Consistent practice with sample papers builds confidence and familiarity with question formats, ensuring your child is well-prepared for the actual exam.

Preparing for the 11+ Exam

Preparing for the 11+ exam involves utilizing Non-Verbal Reasoning PDFs to master strategies, practice time management, and build confidence in solving spatial and pattern-based questions effectively.

Time Management Strategies

Effective time management is crucial for success in the 11+ exam. Allocate specific time limits for each question type during practice to improve speed and accuracy. Start with easier questions to secure quick points before tackling more complex ones. Use timers while practicing Non-Verbal Reasoning PDFs to simulate exam conditions. Prioritize questions involving shape sequences and spatial awareness, as these often require more thought. Review answers regularly to identify and address weaknesses promptly. By balancing speed and precision, students can optimize their performance and reduce exam stress. Regular practice with timed sessions ensures readiness for the actual test.

Tips for Solving Non-Verbal Reasoning Questions Quickly

To solve non-verbal reasoning questions efficiently, focus on identifying patterns and relationships between shapes. Look for transformations like rotation, reflection, or scaling. Practice with examples to recognize common patterns, and use time management by setting timers during practice. Stay calm and systematic, and consider sketching to visualize relationships. Recognizing these strategies will enhance your speed and accuracy in tackling such questions effectively.

Role of Parents in Preparation

Parents play a vital role by encouraging consistent practice and providing guidance with non-verbal reasoning PDF resources, helping children build confidence and problem-solving skills effectively.

Guiding Your Child Through Practice Papers

Guiding your child through non-verbal reasoning 11+ PDF practice papers involves creating a structured study routine. Parents should start by explaining question types, such as shape sequences and spatial awareness, to ensure understanding. Encourage children to attempt problems independently, then review answers together to discuss mistakes. Timed sessions can help build exam stamina. Providing positive feedback and highlighting progress motivates children to stay focused. Additionally, using the provided answers to verify solutions helps reinforce learning. Regular practice with varied papers ensures exposure to different question styles, improving overall problem-solving skills and exam readiness. Consistency is key to achieving success.

Monitoring Progress and Providing Feedback

Monitoring progress and providing feedback is crucial for improving non-verbal reasoning skills. Regularly review your child’s practice papers to identify strengths and weaknesses. Focus on question types they find challenging, such as shape sequences or spatial awareness. Offer constructive feedback by explaining solutions clearly and discussing alternative approaches. Use the answer keys in 11+ PDF resources to track accuracy and speed. Celebrate improvements to boost confidence and address areas needing more practice. Tailor study plans based on progress, ensuring balanced attention to all question types. Consistent feedback helps refine problem-solving strategies and builds exam readiness effectively over time.

Common Mistakes to Avoid

Common mistakes include rushing through questions, misinterpreting patterns, and not following instructions carefully. Practice with 11+ PDFs helps identify and rectify these errors effectively.

Understanding Question Types to Minimize Errors

Understanding the types of non-verbal reasoning questions is crucial for minimizing errors. Common question types include shape sequences, pattern completion, and spatial awareness. Each requires a different approach, such as identifying transformations or rotations. Familiarizing yourself with these formats through 11+ PDF practice papers helps in recognizing patterns and improving problem-solving skills. Misinterpreting question types often leads to incorrect answers. By practicing with sample papers, you can better understand the logic behind each question and develop strategies to tackle them efficiently. This targeted approach reduces errors and builds confidence for the actual exam. Regular practice is key to mastery.

Importance of Reading Instructions Carefully

Reading instructions carefully is vital for success in non-verbal reasoning tests. Misinterpreting the question can lead to errors, even if the solution seems straightforward. For example, understanding whether a shape sequence involves rotation, reflection, or a pattern is crucial. Instructions often provide clues about the logic behind the question, such as identifying the “next shape” or “completing the pattern;” Skipping or misunderstanding these details can result in incorrect answers. Practicing with 11+ PDF papers helps children develop the habit of reading instructions thoroughly, ensuring they address the question accurately. This skill is essential for maximizing scores and minimizing avoidable mistakes.